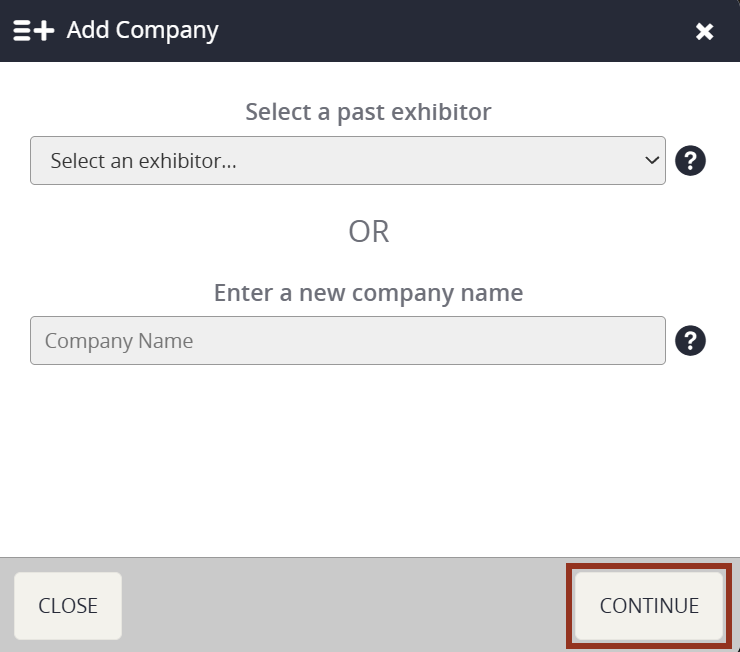
- A popup will appear. Follow the prompt to either select a past company or enter a new company name. Then select the Continue button.
This article outlines how to individually add companies to the Expo Harvester and mark them as sponsors only.
NOTE
If you need to add more than a few sponsoring companies, you may wish to use the Import Data mission instead. When populating the import data spreadsheet, be sure to place a 1 in column M titled "Sponsor?" and place a 0 in column N titled "Exhibitor".
Process
- Launch the Expo Harvester module for your event. In the main navigation, hover over Expo Data icon then select Companies from the dropdown (Fig. 1).
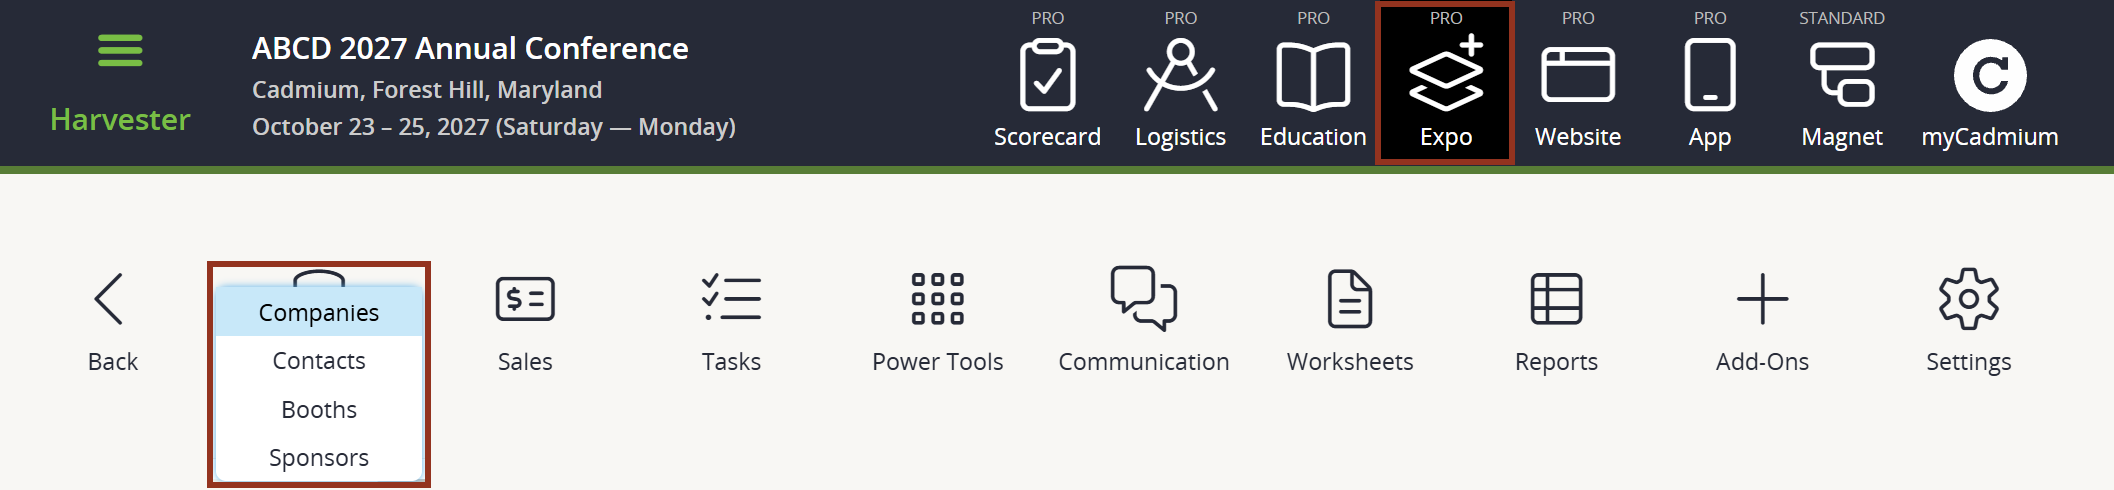
Fig. 1 - Expo Harvester's Expo Data Icon.
- To add a sponsoring ONLY company, select the Add Company button at the top of the Companies page (Fig. 2).

Fig. 2 - Companies Page Add Company Button.
- In the Company Details popup, make sure to check Sponsor and uncheck 'Exhibiting'. Then select the Add Company button (Fig. 4).
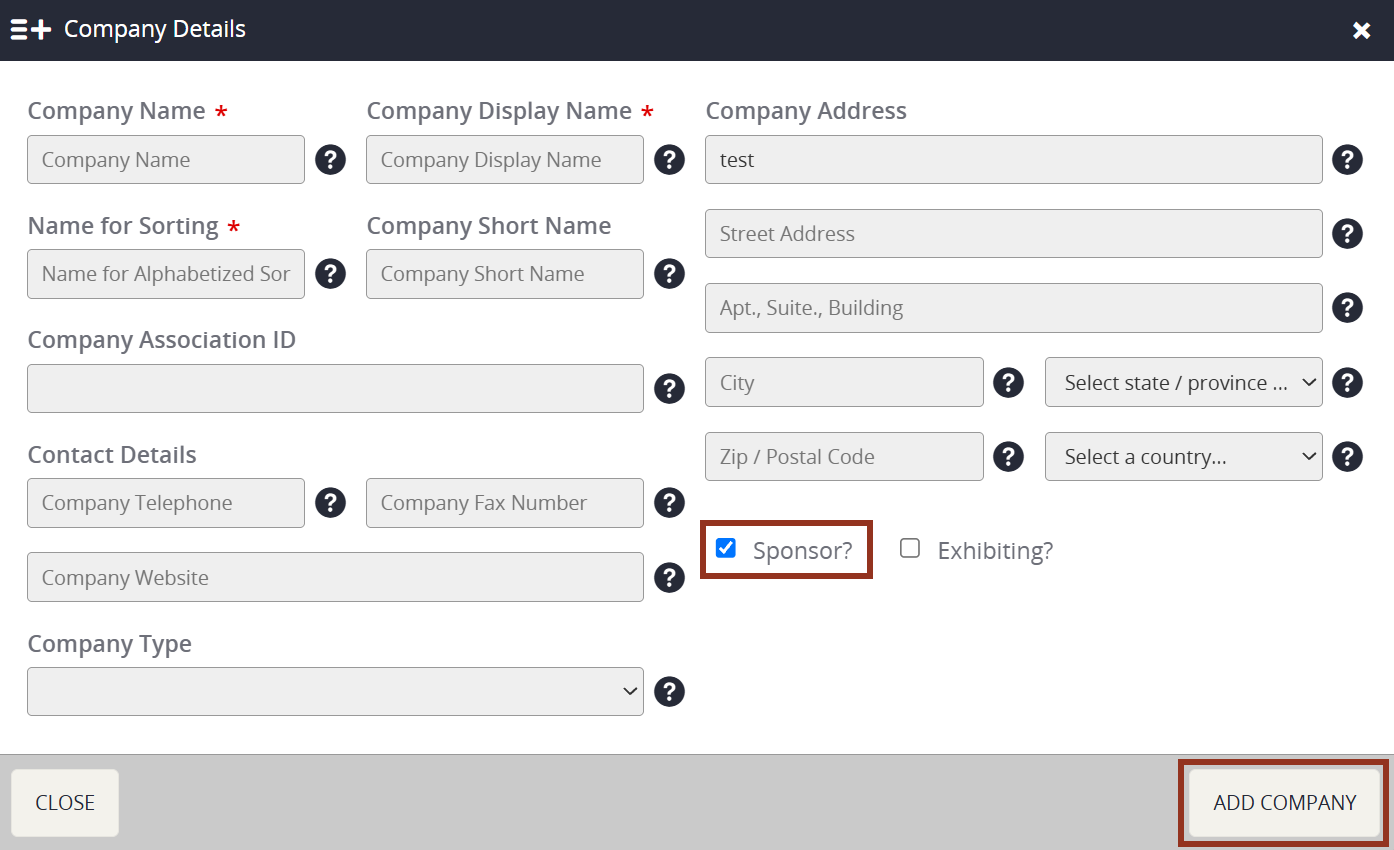
Fig. 4 - Company Details Popup.
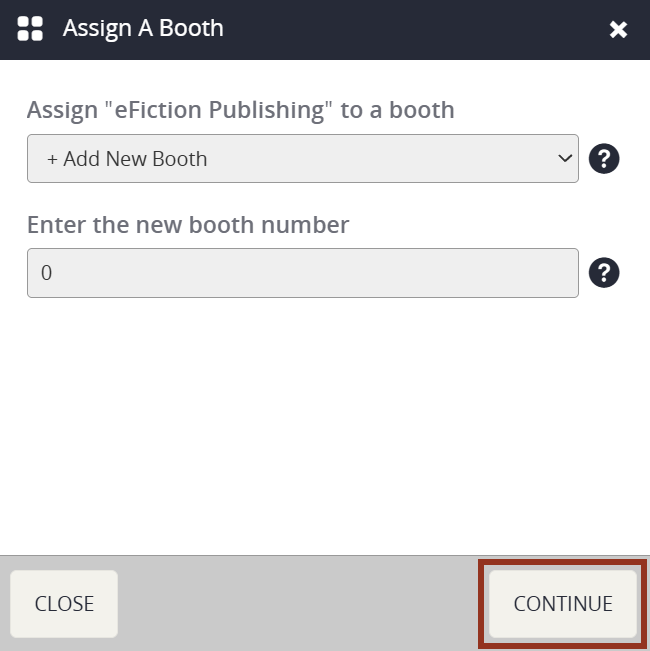
Once company details have been provided the Assign a Booth popup will appear. For your sponsor to display on the Eventscribe website or app in the sponsor list, they must be assigned to a booth. If they do not have a physical booth, you can use booth 0.
- Select + Add a New Booth from the dropdown and enter the appropriate booth number, or 0. Then select the Continue button.
Assign Booth 0 To Existing Sponsor
If your sponsor is already in the Harvester and you need to assign them to a booth 0, follow these steps:
- Navigate to the Booths page and select the Add Booth button.
- Enter 0 for the number.
- Once the booth 0 is in the booths list, click on the booth and select Rent Booth from the row pop-up (Fig. 6).
- Select your sponsoring company.
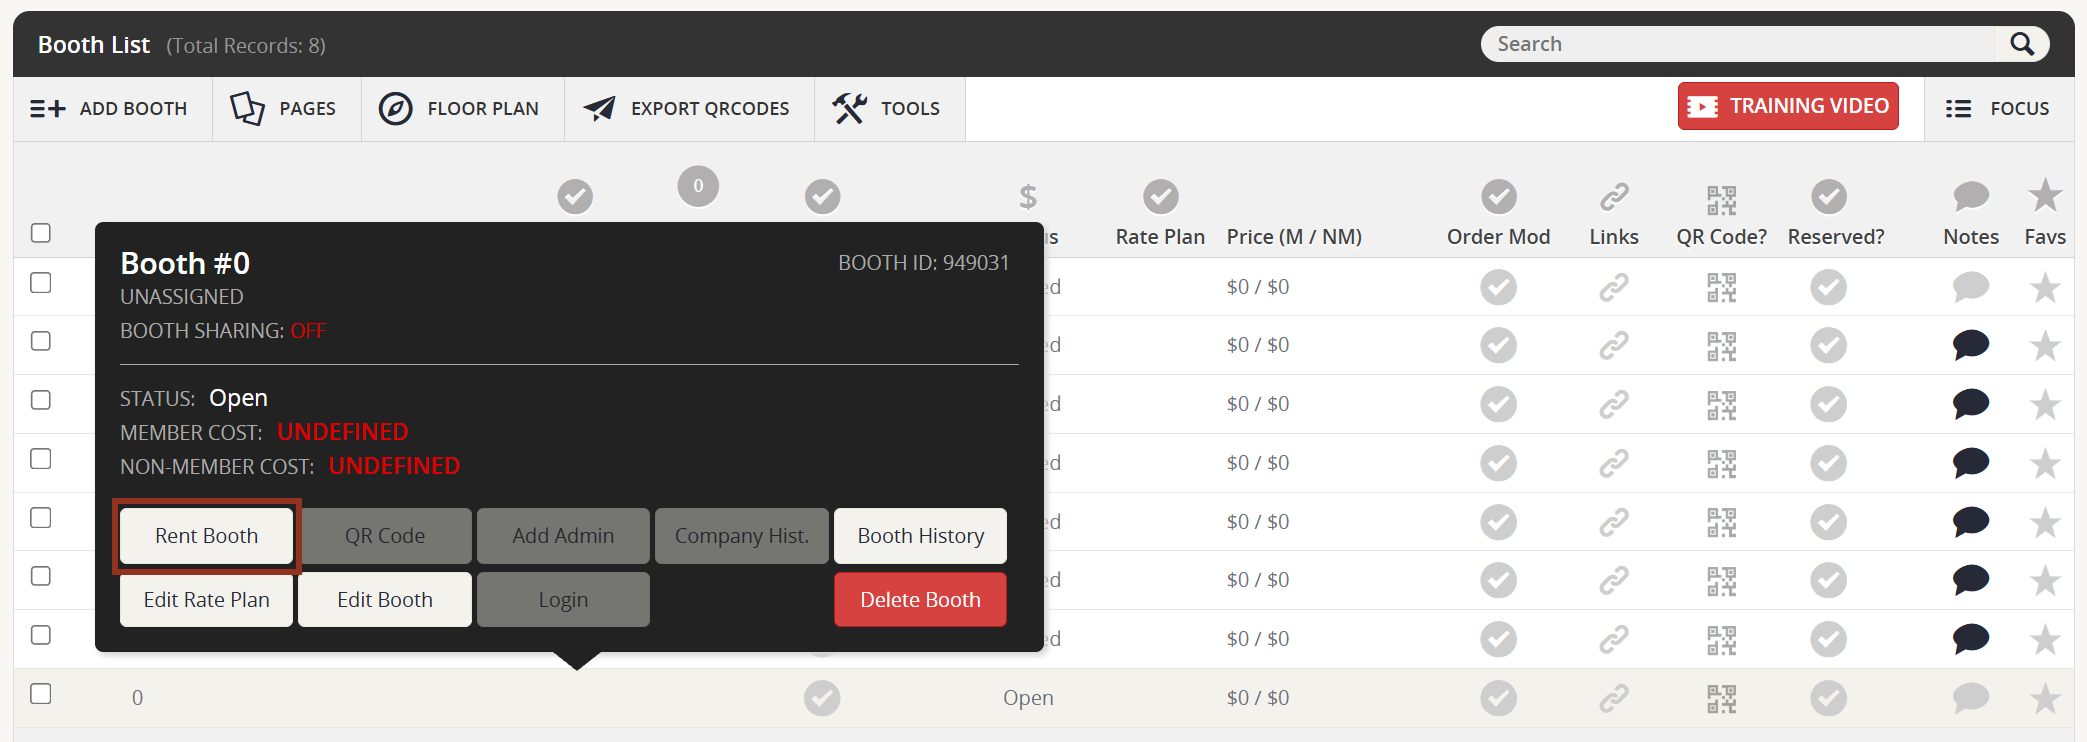
Fig. 6 - Booth Page Row Pop-up.
Last modified Jul 08, 2026
Was this article helpful?
That’s Great!
Thank you for your feedback
Sorry! We couldn't be helpful
Thank you for your feedback
Feedback sent
We appreciate your effort and will try to fix the article