- Select Connect to Printer on the Eventscribe Check-in App Check-In Kiosk screen.
CADMIUM RECOMMENDS
We recommend sharing this with your Onsite Technical Lead for Check-in and Badging
To use self-service check-in and on-demand badge printing stations onsite at your event, you will need to setup and activate the on-demand printers and check-in kiosk devices. This process involves several steps:
- Set up the Check-in Kiosk Device and download the Eventscribe Check-in App
- Connect the printer to the Eventscribe Check-in App using the printer's IP address
- Activate the Check-in Kiosk in Eventscribe Onsite
- Perform a print validation to ensure the print quality is acceptable
- Confirm the event information on the Eventscribe Check-in App Welcome Screen
Set up the Check-in Kiosk Device
To set up the check-in kiosk, follow the steps below:
- Connect the check-in device to a power source.
- Connect the check-in device to the same local network as the corresponding printer.
Once the check-in device is connected to the same local network as the corresponding printer:
- Download, install and open the “Eventscribe Check-in" app from the Apple App Store or Google Play Store.
NOTE
If this is the first time installing this app, you will need to accept notifications to allow the app to communicate with the Cadmium system when checking in registrants.
Connect the Printer to the Eventscribe Check-in App
The next step is to connect the printer the printer to the Eventscribe Check-in App by following these steps:

- Enter the printer IP Address in the Enter IP Address field and select Next.

NOTE
To find the IP address for Cadmium’s recommended Zebra ZD621 model printer, press and hold the “feed” and “cancel” buttons on the printer (the 2nd and 3rd buttons) to print the printer configuration sheet.
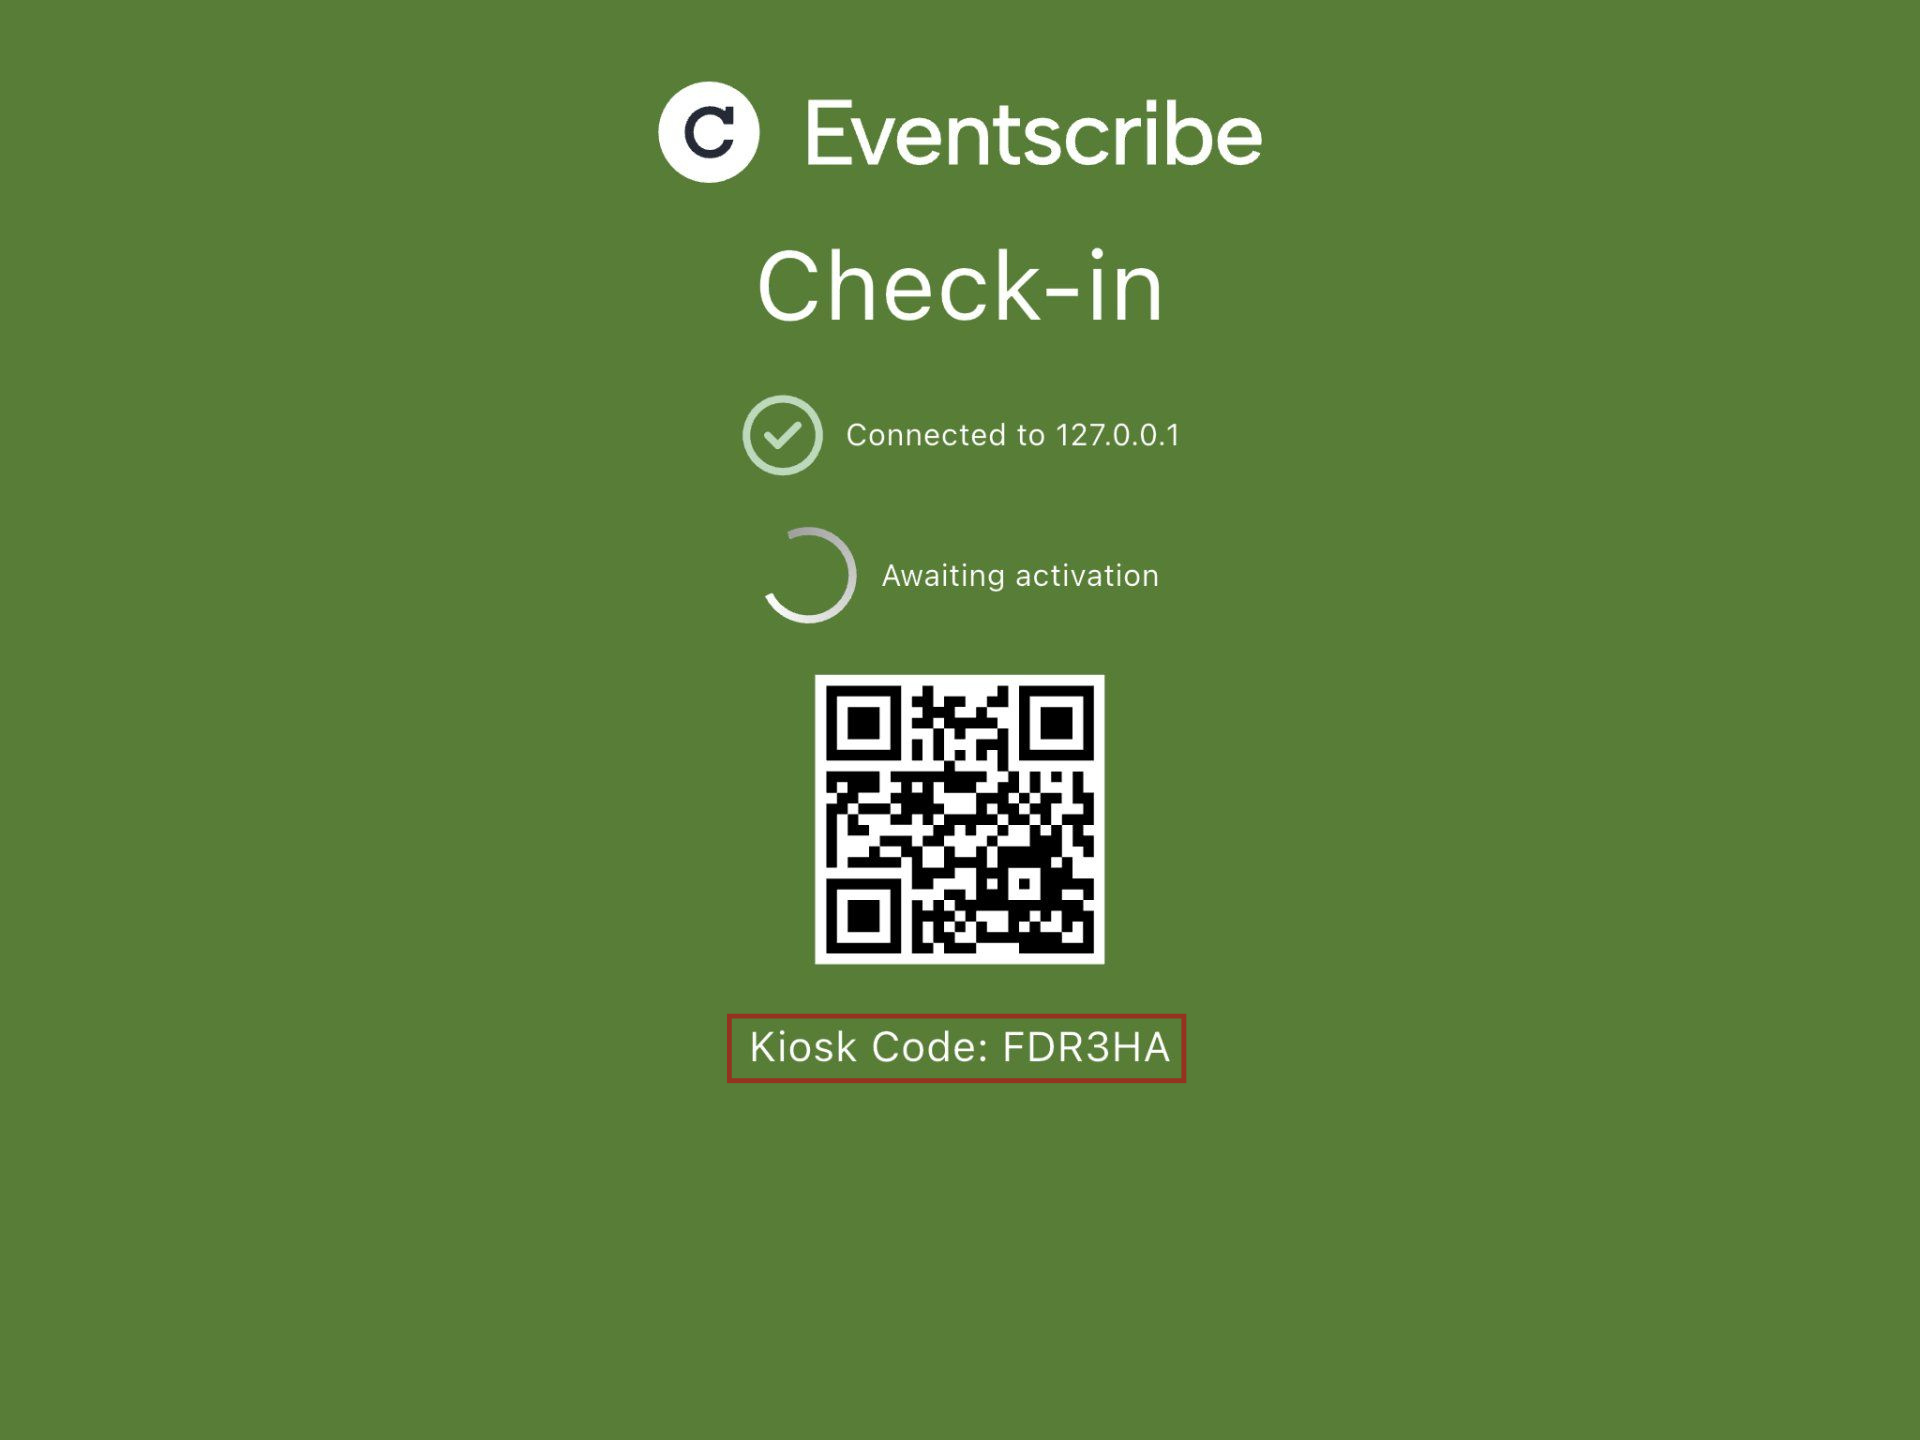
- The Eventscribe Check-in App screen will display that it has successfully connected to the printer and will transition to an “Awaiting Activation” screen. The Kiosk code on this screen will be used in the next steps to activate the printer in Eventscribe Onsite.

Activate the Kiosk in Eventscribe Onsite
- To activate the check-in kiosk for your event and connect the printer for on-demand badge printing, access the Kiosks module in Onsite from any computer or mobile device.
NOTE
This device does not need to be on the same network as the kiosk tablet or printer.
- To access Onsite, scan the QR code displayed on the Eventscribe Check-in App activation screen or by visiting onsite.gocadmium.com. Log in to Onsite using your Onsite account email address.
To learn more about Onsite, please visit the Eventscribe Onsite knowledge base.
NOTE
If you are unable to access Onsite, please reach out to your event organizer.
Add the Kiosk in Eventscribe Onsite
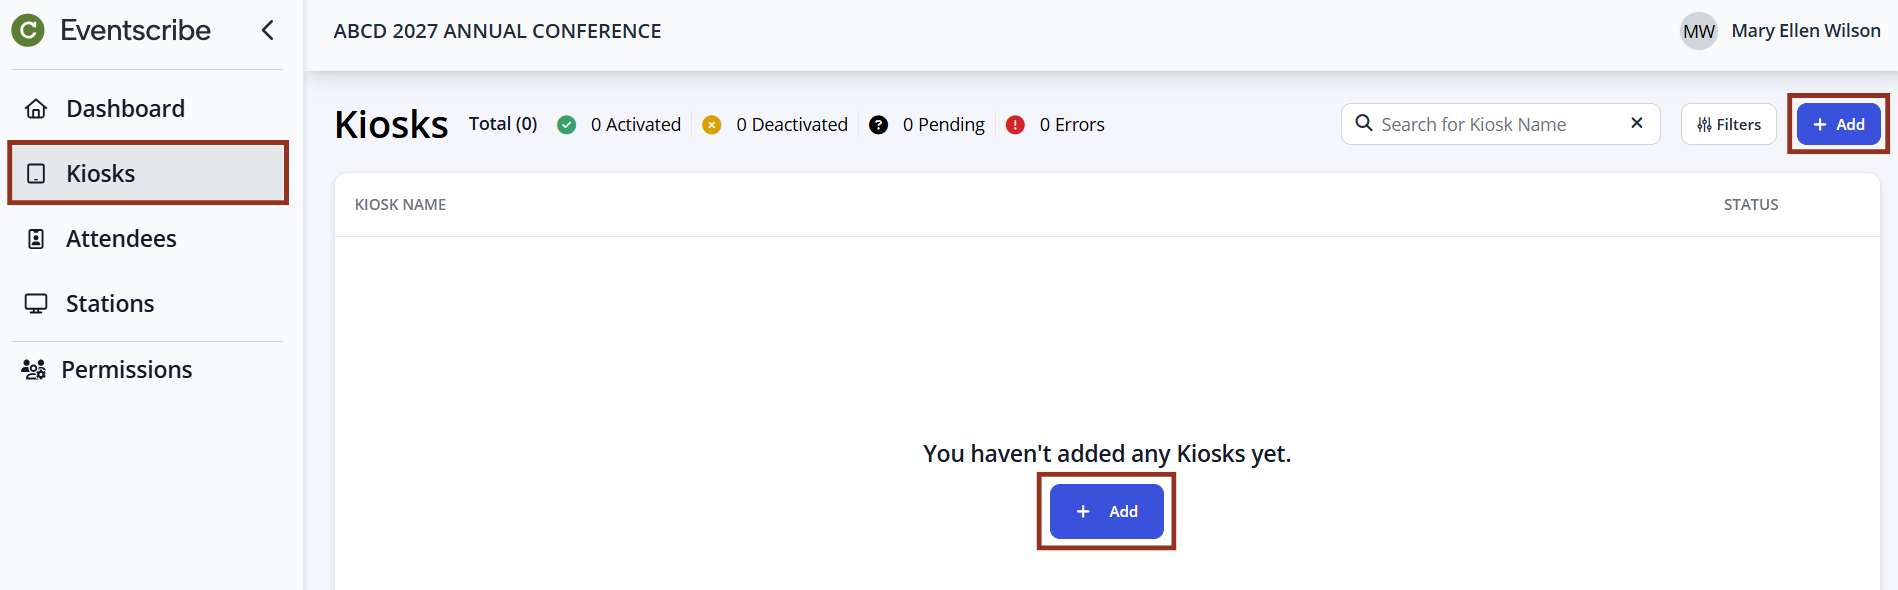
- Select the Kiosks module located in the left side-bar menu.
- Click + Add to add a kiosk to the event.
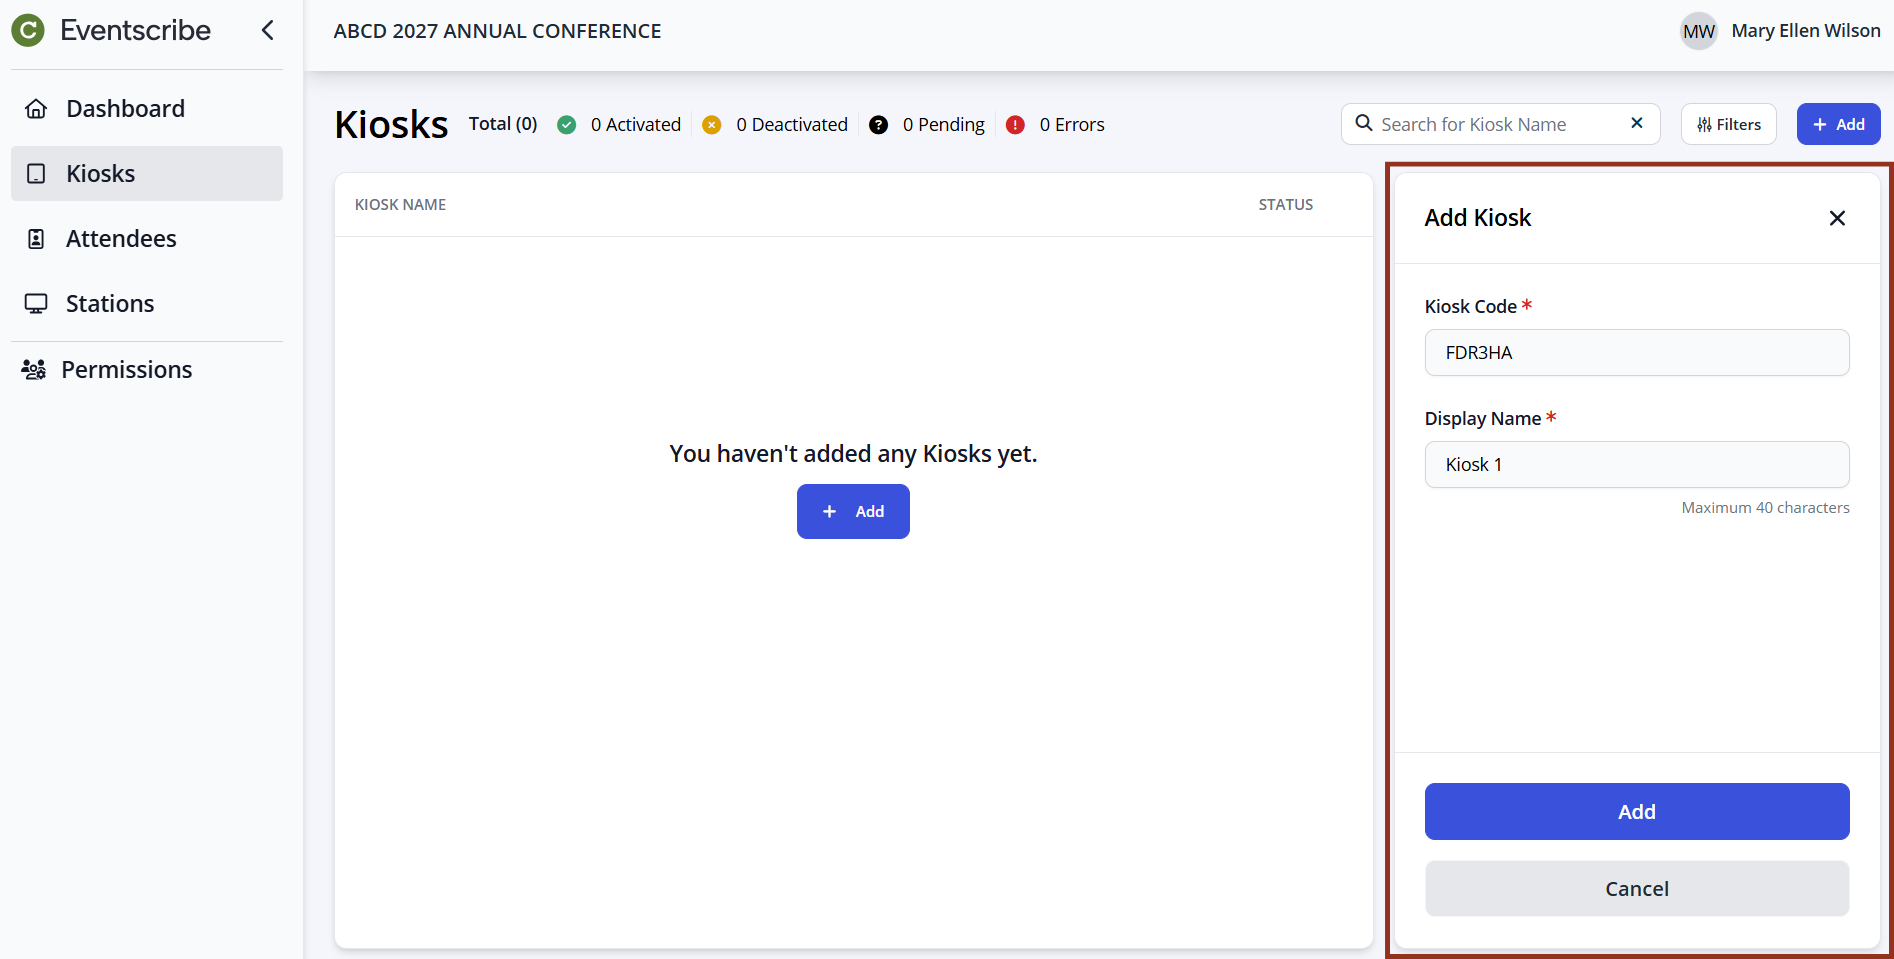
- Enter the Kiosk Code found on the “Awaiting Activation” screen of the Eventscribe Check-in App into the Kiosk Code field in Onsite.
- Enter a unique kiosk name (or leave the default name) in the Display Name field. The kiosk name will display on the Eventscribe Check-in App welcome screen once the kiosk is successfully activated.
- Click the Add button at the bottom of the Add Kiosk side panel to complete the process of adding the printer to Onsite.
CADMIUM RECOMMENDS
Create a unique kiosk name with identifiable information (such as kiosk number and/or location) to help locate and identify the kiosk when manually printing a badge or troubleshooting a printer issue onsite.
Print Validation
Print validation is an important way to confirm that the quality of the printed badges is acceptable to the human eye and that any QR codes on the badge can be properly scanned. To accomplish this, a Validation Badge should be printed from each check-in kiosk and confirmed to ensure that the real event badges will work for your event.
IMPORTANT NOTE
The Validation Badge is not the real event badge.
CADMIUM RECOMMENDS
It is highly recommended to complete the printer validation steps to ensure the badges are printed correctly and can be read and scanned. You can skip the printer validation steps by selecting Skip (Not Recommended) to skip the print validation and proceed directly to the welcome screen from either step of the Print Validation process, however this is not recommended.
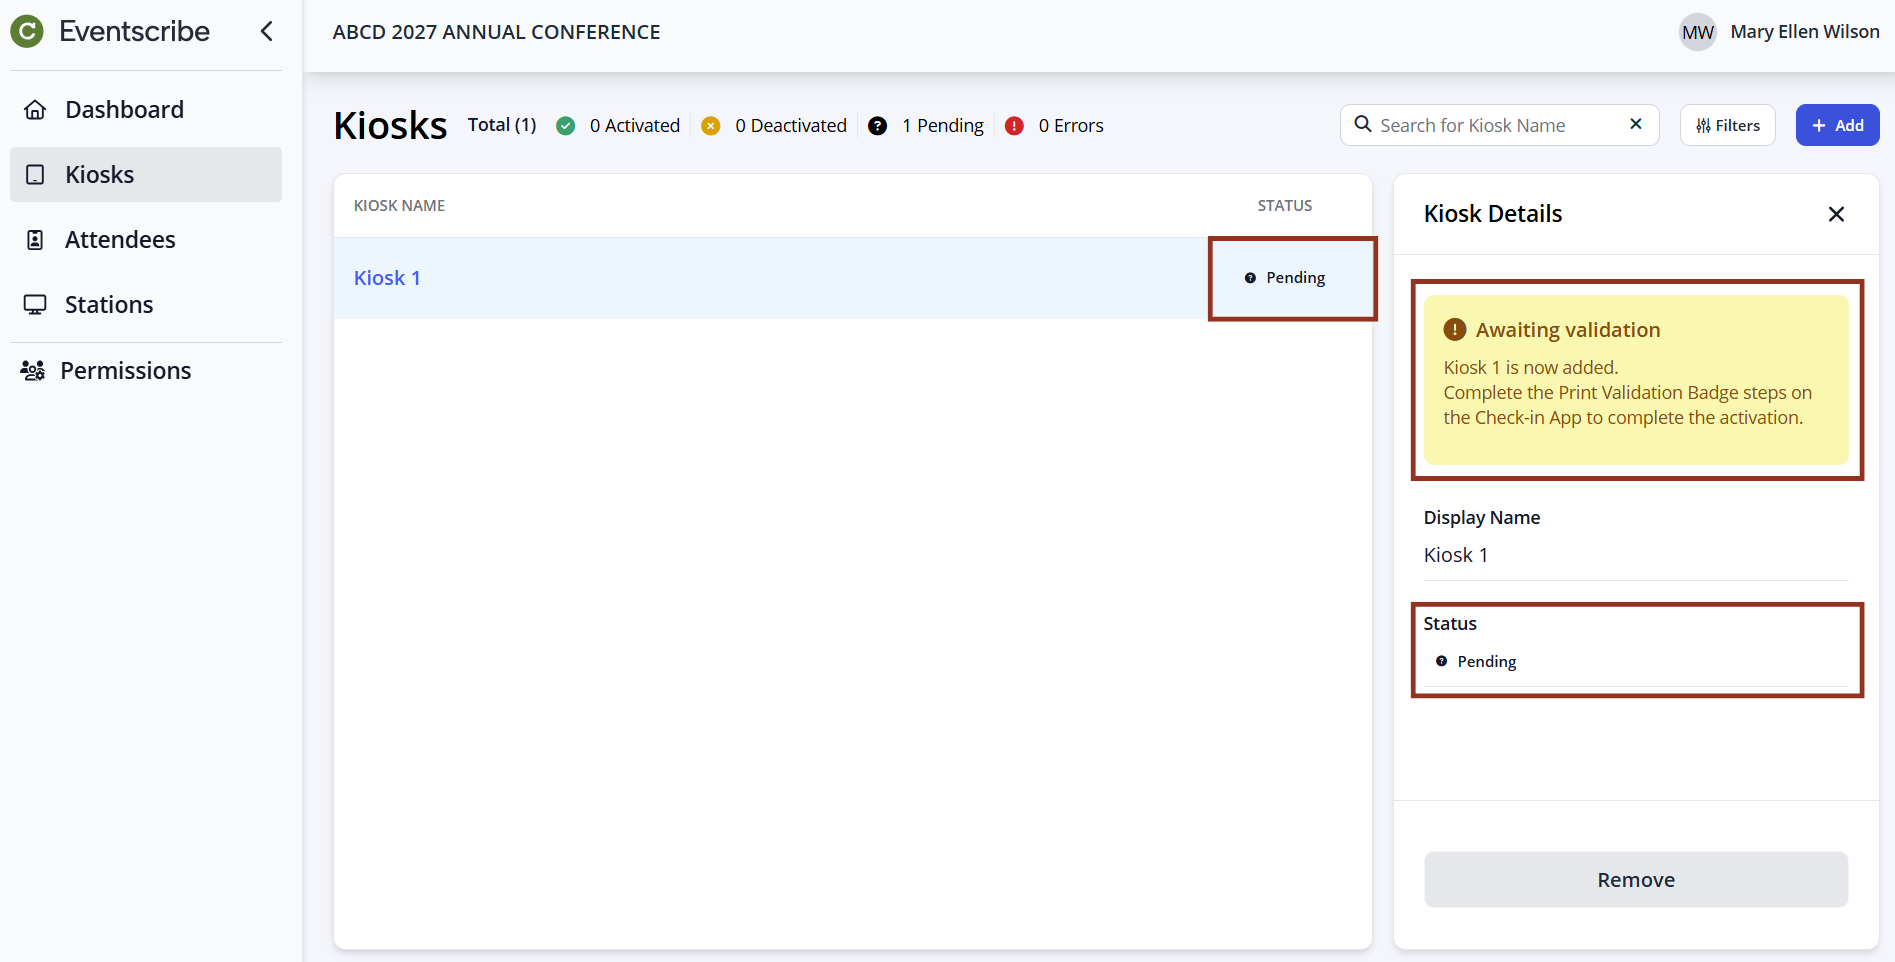
- Once the kiosk is added and activated in Onsite, it will be listed in the Kiosk module and the status will be listed as Pending. A message will display under the Kiosk Details indicating that the “Print Validation Badge” steps should be followed in the Eventscribe Check-in App to complete activation of the kiosk.
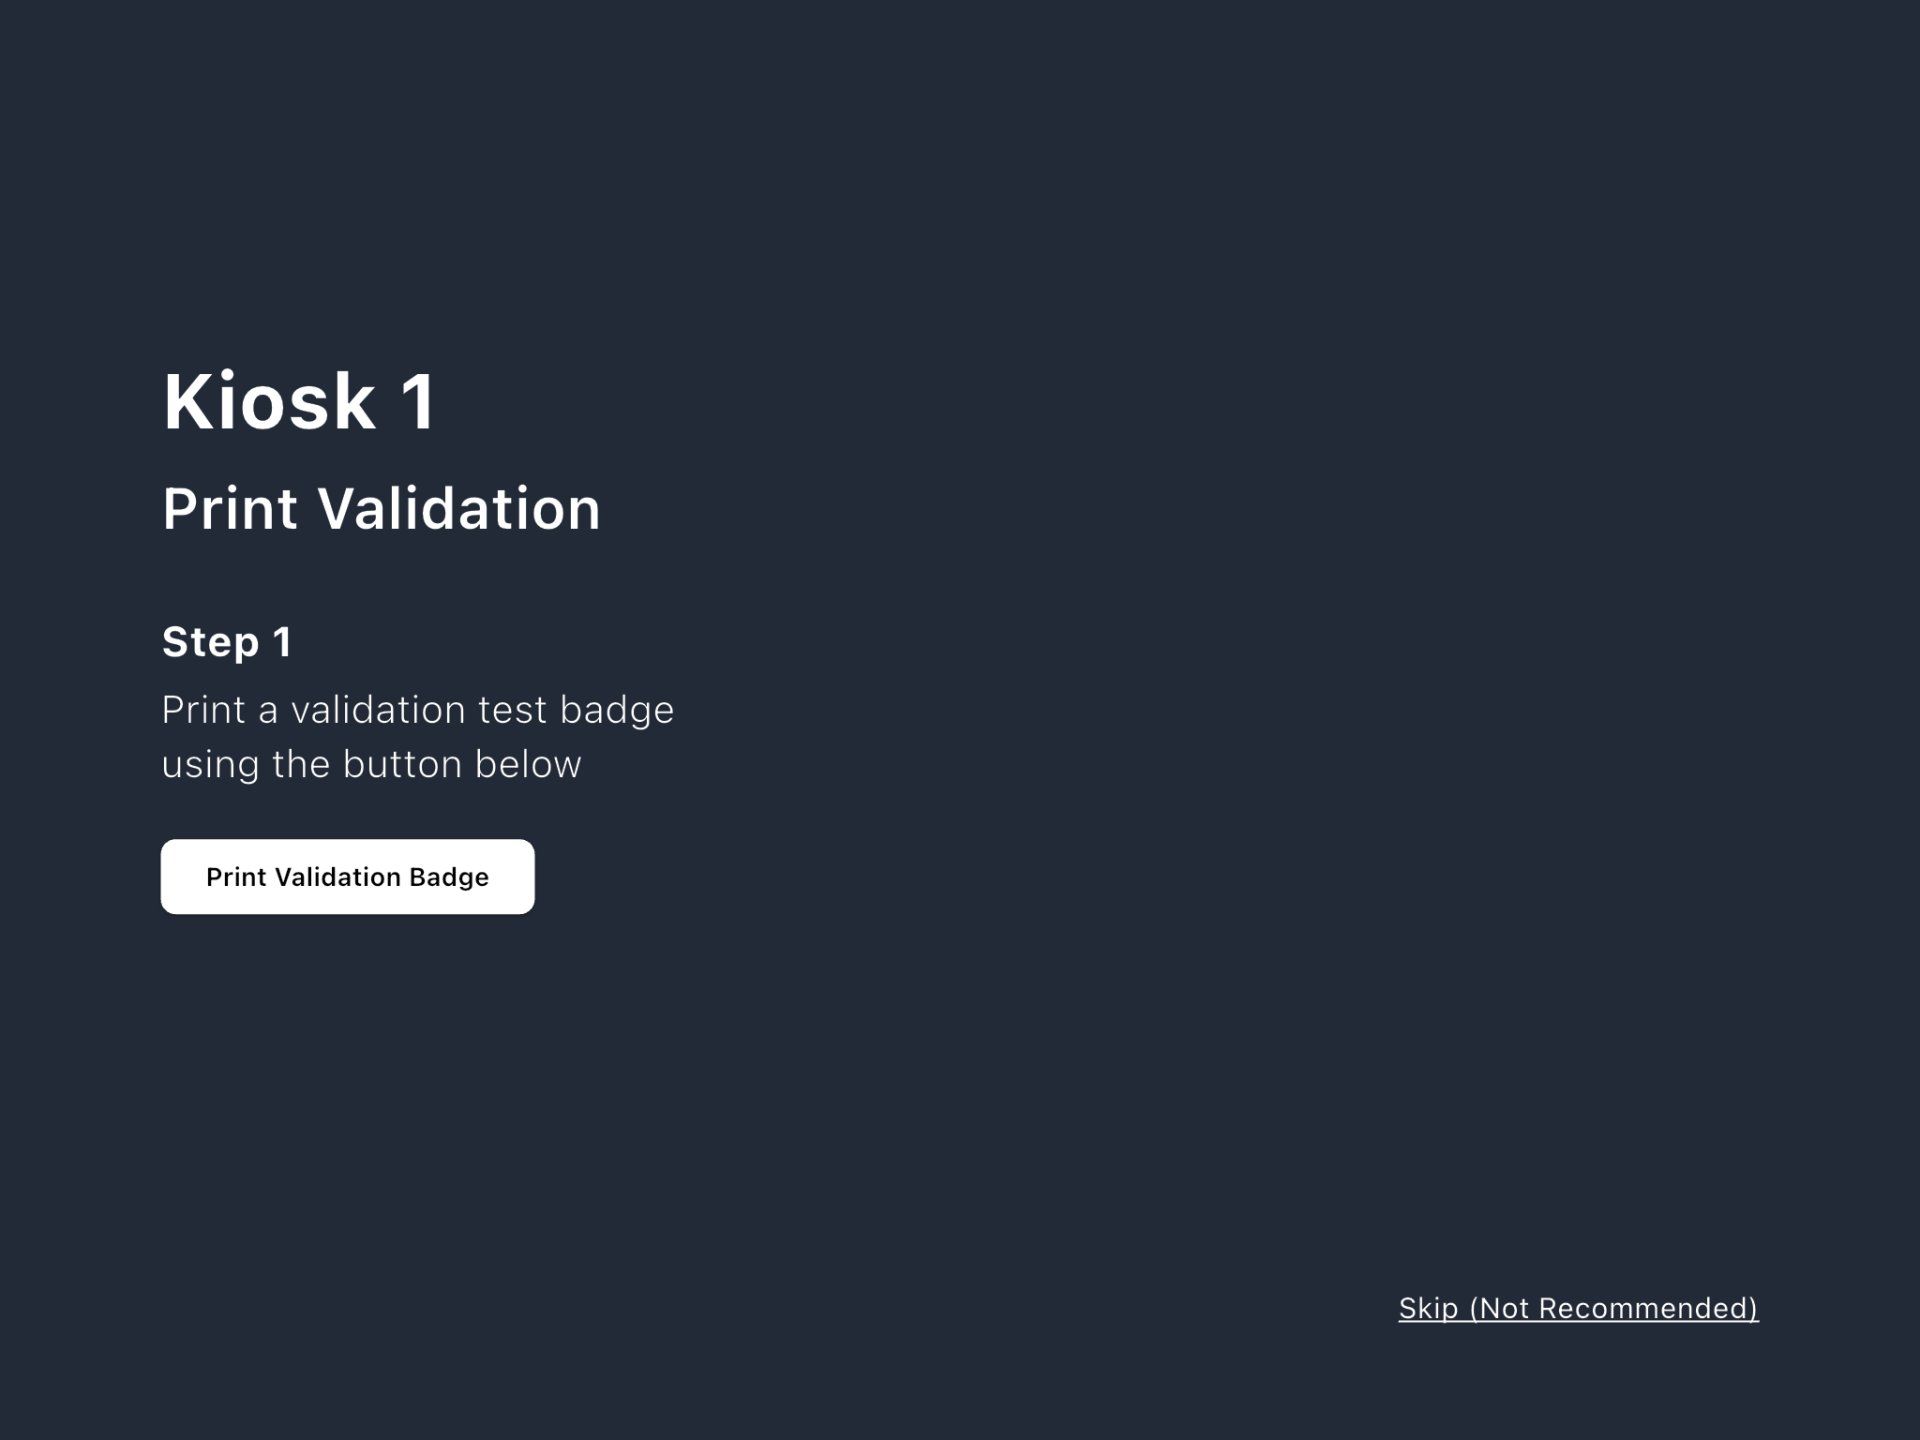
- The Eventscribe Check-in App screen will update to display Step 1 of the Print Validation process. Select Print Validation Badge on the app screen to print a Validation Badge for that kiosk.
NOTE
If your badge does not print, select Back to Step 1 to return to Step 1 and print the validation badge again.
The validation badge will match the size of the badge selected for the event. It will include an outline of the edges of the badge, an Eventscribe logo, the words “Validation Print” and a QR code that is unique to that kiosk/printer combination.
- Confirm that the validation badge visually aligns on the badge stock (Fig. 1). You should be able to see most of the borders on the badge and it should be as closely aligned to the edges of the badge as possible, both left-to-right and top-to-bottom. Confirm that the validation badge print is not too light or too dark. This can make it difficult for printed badges to be read by other attendees, and difficult for QR codes to be scanned.

Fig. 1 - Sample Validation Print
NOTE
If you are using pre-printed badge stock for your event, it is possible that some aspects of the Validation Print will overlap with the event banner or logos. This should not cause an issue with your final design.
If you receive an error message during Step 1, refer to the Print Validation Troubleshooting steps below.
- Once the validation badge has printed, the Eventscribe Check-in App will refresh to display Step 2 of the Print Validation.
- Scan the QR code on the Validation Print to confirm that the quality and layout of the QR code on the badge can be read by the scanner.
- If the scan is successful, the app will display a welcome screen for the event, which indicates it is ready to scan the check-in QR codes.
NOTE
It may take up to 5 minutes for the kiosk to activate and display the welcome screen.
Print Validation Troubleshooting
- If the wrong QR code is scanned, the app will display a Wrong QR code error. Confirm that the Validation Badge printed from that kiosk printer was scanned. Each validation badge prints a QR code that is unique to that kiosk/printer combination.
- If the QR is not recognized by the Eventscribe Check-in App, adjust the Zebra printer settings, reprint the validation badge and scan the QR code again.
- If the validation badge is not properly aligned on the badge stock, you may need to reload the badge stock and/or recalibrate the printer.
Eventscribe Check-in App Welcome Screen
After the kiosk is activated, confirm that the event name and dates are correct on the Eventscribe Check-in App welcome screen. To edit the event name or dates displayed on the welcome screen, follow these instructions. These updates may take up to 1 hour to reflect on the kiosk app. You will also need to log out and back into Onsite and remove and re-add the kiosk to update the welcome screen display on the kiosk.
NOTE
If this is the first time the Eventscribe Check-in App has been used on this tablet, a notification will display requesting access to use the device’s camera for scanning purposes. Select Allow.
Lock the Check-in Device
To ensure the Eventscribe Check-in App remains open on the check-in device during the event, Cadmium recommends locking the device to avoid an attendee accidentally closing out of the application.
Android Device | Follow these instructions to access the App Pinning settings to lock an Android device. |
iOS Device | Follow these instructions to access the Guided Access settings to lock an iOS device. |
If you encounter any issues during the Check-in kiosk set up and activation, please refer to the Check-in Kiosk and App Troubleshooting Guide.
To learn more about the next steps for implementing Check-in and Badging at your event, return to the Check-in and Badging Event Organizer's Guide.
Last modified Mar 19, 2025
Was this article helpful?
That’s Great!
Thank you for your feedback
Sorry! We couldn't be helpful
Thank you for your feedback
Feedback sent
We appreciate your effort and will try to fix the article