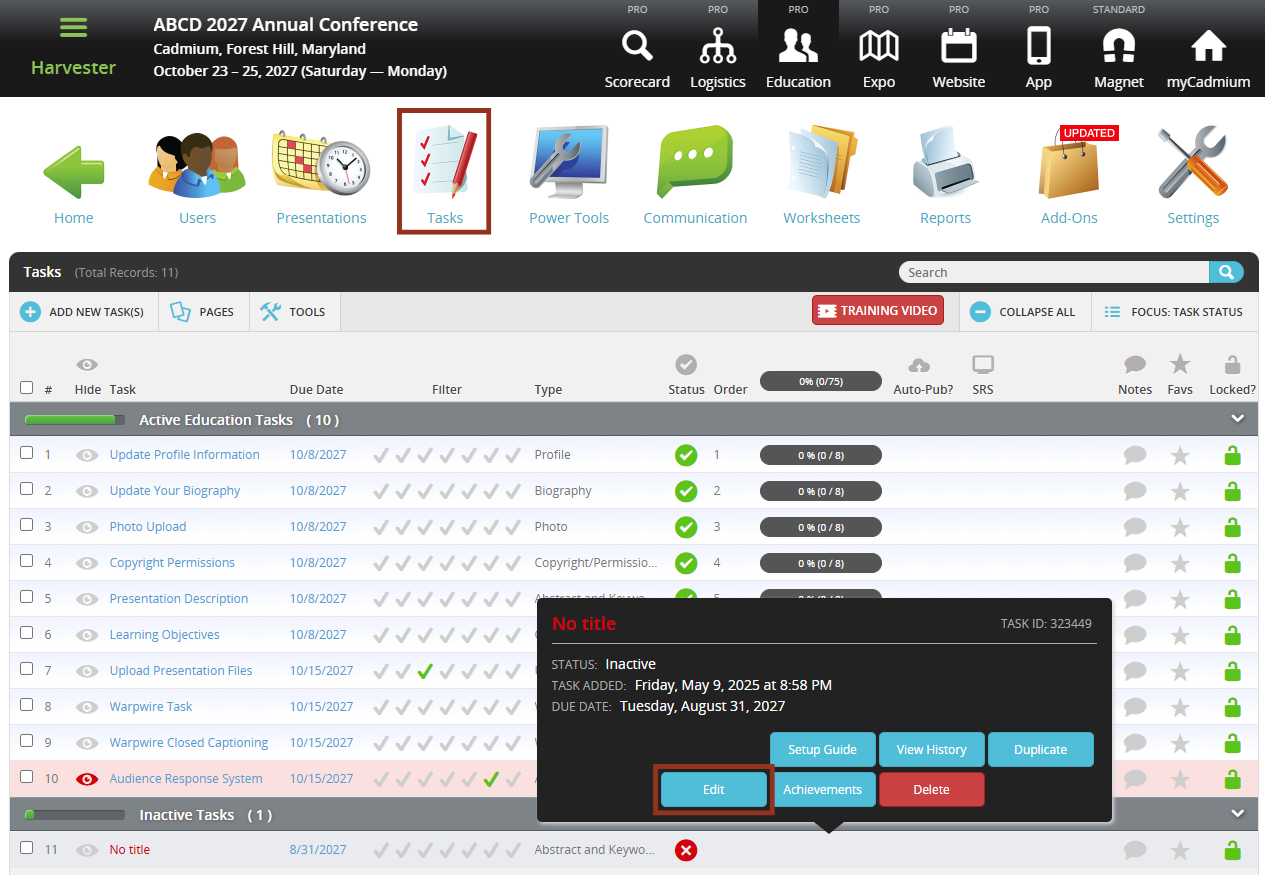
- From the Tasks page in your Education Harvester, click on the row for the Disclosures (Event-Based) Task.
- Then, select the Edit button.
Use the Disclosures (Event-Based) Task to collect financial disclosure information from each speaker at the event level—regardless of their specific presentations or perceived relevance of any financial relationships.
NOTE
If you're using an Eventscribe Website or Mobile App, disclosures visibility is managed through the Admin Mitigation Page.
Before configuring the task, ensure that:
- Add the Disclosures (Event-Based) Task from the Task Index.
- Populate the Financial Relationship Library with all potential relationships.
Configuring the Disclosures Task
To create an Event-Based Disclosures Task, follow the steps below:
- In the task editor, modify the following:
- Task Title: This is the name users will see on their Task List.
- Due Date: Sets a visual (not enforced) deadline for users.
- Cutoff Date (Optional): To enforce a deadline, enter a date in the “Cutoff date to receive disclosures” field. After 12:01 AM on this date, users will be unable to submit.
- Status: Set to Active to make the task visible to users.
- Task Order: Determines the position of the task on the Task List.

NOTE
To enforce a submission deadline, use the "Cutoff Date to Receive Disclosures" setting further down the page. The visual Due Date turns red after passing but does not block submissions.
- In the Main Instructions field, update the default text to reflect your event’s name and specific requirements. You may use basic HTML tags (e.g., <b>, <i>) to format the text.
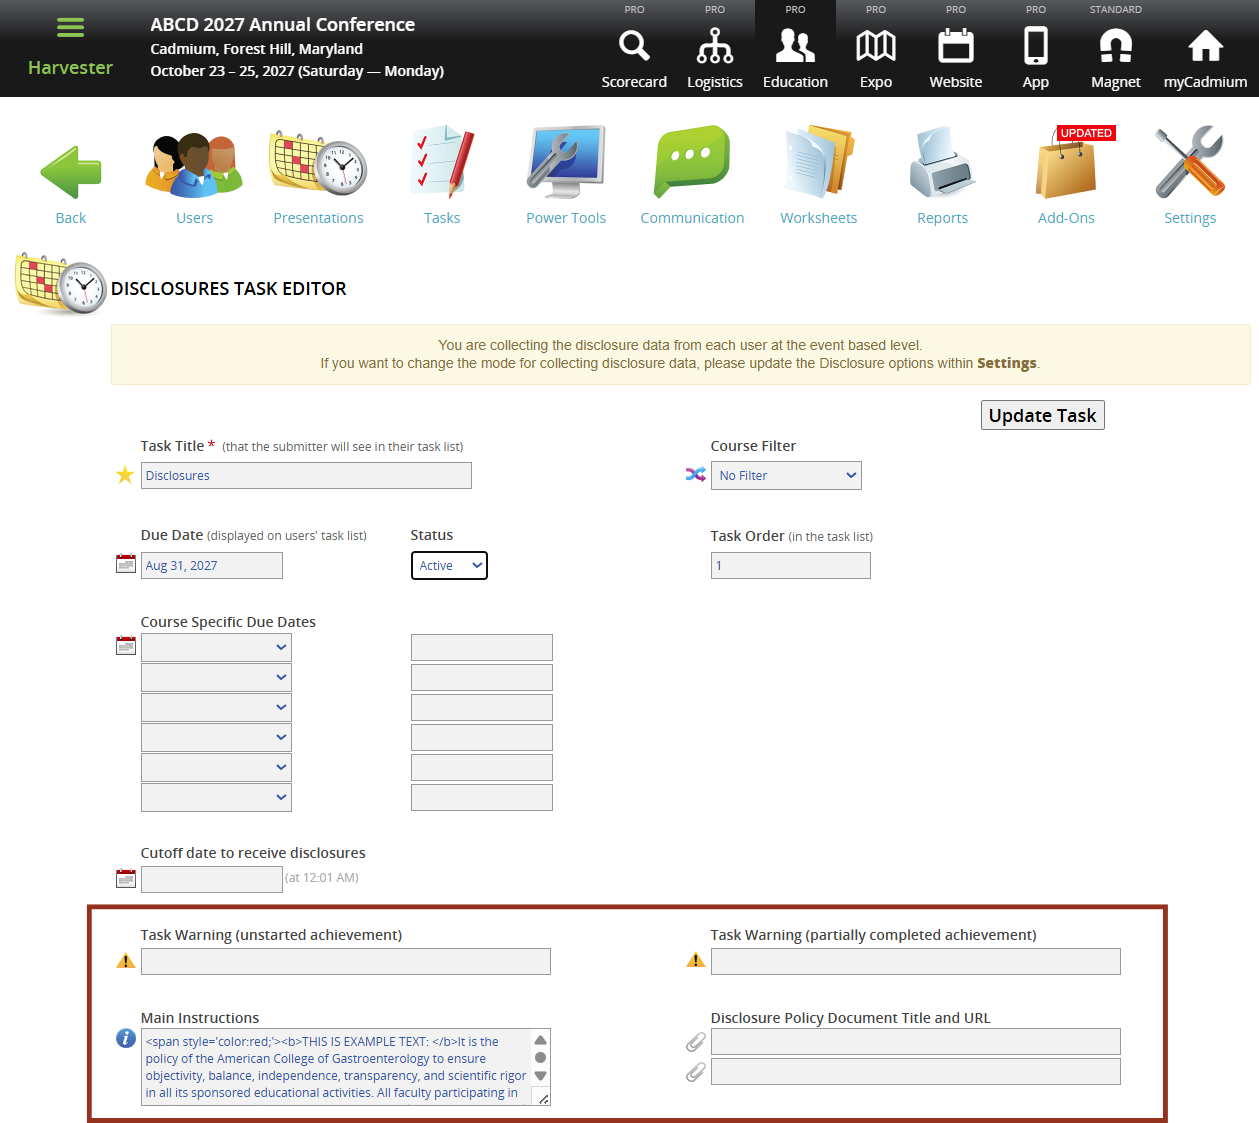
- Apply (optional) filters to help assign tasks to the appropriate users.
- Course Filter: This is available only if course names exist in Education Harvester and allows you to select specific courses to assign the task to relevant users. You may also enter Course-Specific Due Dates (must be later than the overall due date).
- Overall Role Filter: This allows you to assign tasks based on user-level roles such as VIP, Reviewer, etc.
- Faculty Role Filter: This allows you to assign the task to users with specific faculty roles (e.g., Author, Chair, Moderator). Leave this blank to include all roles.
- Speaker Filter: This allows you to manually assign the task to specific individuals.
IMPORTANT NOTE
Do not use the Speaker Filter in combination with the Faculty Role Filter.
Configuring the Disclosure Form
The disclosure form consists of two parts, however additional sections can be added to the form, if needed.
- Disclosure Declaration: Asks users whether they have any financial relationships to disclose
- Financial Relationship Section: Allows users a space to provide details about those relationships, if applicable.
Configuring the Disclosure Declaration
This section asks users whether they have any financial relationships to disclose. To configure this section, navigate to the Main Disclosure Form section of the task editor and follow these steps:
- Toggle Ask user to identify their role? to Yes if you’d like users to select a role.
- Choose a Role Collection Style and update the Role List, if needed.
- Default roles include: Speaker, Planner, Reviewer, and Manager.
- Edit the Disclosure Declaration Label, Instructions, and Response Choices.
Toggle Ask for spouse/partner name? to Yes, if applicable.
Enter a label in the Spouse/Partner Text field.

IMPORTANT NOTE
The green checkmark should indicate “No financial relationships,” and the red X should indicate “Has financial relationships.” Make sure any custom text follows this logic.
Financial Relationship Details
This section collects information about any disclosed financial relationships. To configure this section, follow these steps:
- Enter a section label in the Financial Relationship Section - Label field.
- Provide user-facing instructions in the Instructions box.
- Set the label for the action button (which links to the disclosure input form) in the Link to Access Disclosure Declaration Form Label field.
- In the Disclosure Declaration Formsection:
- Set the Financial Relationship Label and Company Name Label.
- Add guidance in the Company Name Instructions box.
- If needed, enter suggested companies in the Company List box—these will appear as autofill options for users.

- Enable additional disclosure fields by toggling them to Yes and completing the label/instruction fields:
- Individuals Involved
- Products Involved
- Services Involved
- Clinical Condition
- Status of Relationship
NOTE
If a list is provided for Products or Services, users can only select from the listed options.
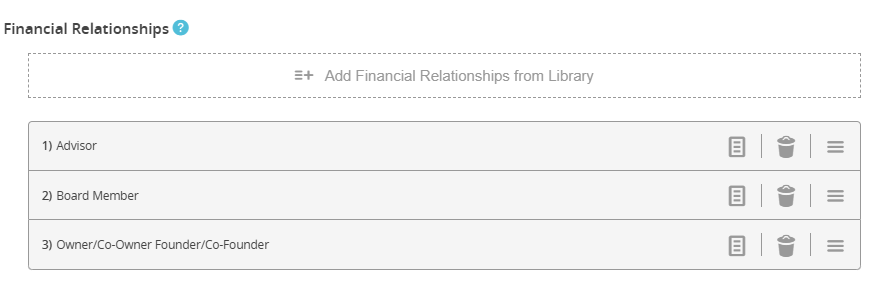
- Under Financial Relationships, select Add Financial Relationships from Library.
- Select relevant entries from the pop-up and select Add Relationships.
- To update your library, select Manage Relationships:
- Use the drag icon to reorder entries.
- Select the trash icon to remove.
- Hover over the document icon to view descriptions.
Format the Financial Disclosure Block
This section controls how the speaker’s disclosure appears in reports and on the Eventscribe Website and Mobile App. To configure this section, follow these steps:
- Navigate to Format Financial Disclosures.
- Choose a Disclosure Grouping method:
- By Company
- By Relationship Type
- Set a Disclosure Label (title for the disclosure block).
- Customize the formatting using disclosure hotkeys.
- Use the Preview box to test and view your formatting.

- If you select grouping by company, define how relationships display under each company (Company Delineation).
- If grouping by relationship type, define how companies display under each type (Relationship Delineation).
Additional Customization Options
The following optional elements can be added:
- Bias Question: Complete the Bias Question Title box and enter a Bias Question to collect bias-related disclosures.
- Off-Label Disclosures: Enter an Off-Label Disclosures Title and Question to prompt an author to answer questions about the off-label product disclosure if they select Add a New Item in their task.
- Treatment/Surgical Procedure Disclosures: Enter a Treatment/Surgical Procedure Disclosures Title, additional text, and up to 2 questions to collect procedure-related disclosures.
- Optional Yes/No Questions: Add up to 8.
- Research Studies: Provide a Research Studies Title and Research Studies Question.
- Optional Checkbox Questions: Add up to 10.
- Optional Freeform Questions: Add up to 10.
- Attestation Statement: Choose an option in the Attestation Statement Options dropdown menu and enter an Attestation Statement Title, Text and up to 10 Questions in the appropriate text boxes. Some selections in the Attestation Statement Options menu may require users to acknowledge the questions you provide.
- Signature Requirement: Complete the Signature Box Text box and an optional Signature Box Disclaimer, if needed to require digital signatures before submission.
- Footer Statement: Complete the Footer Statement box to add a concluding statement below the signature line.
Finalizing and Testing the Task
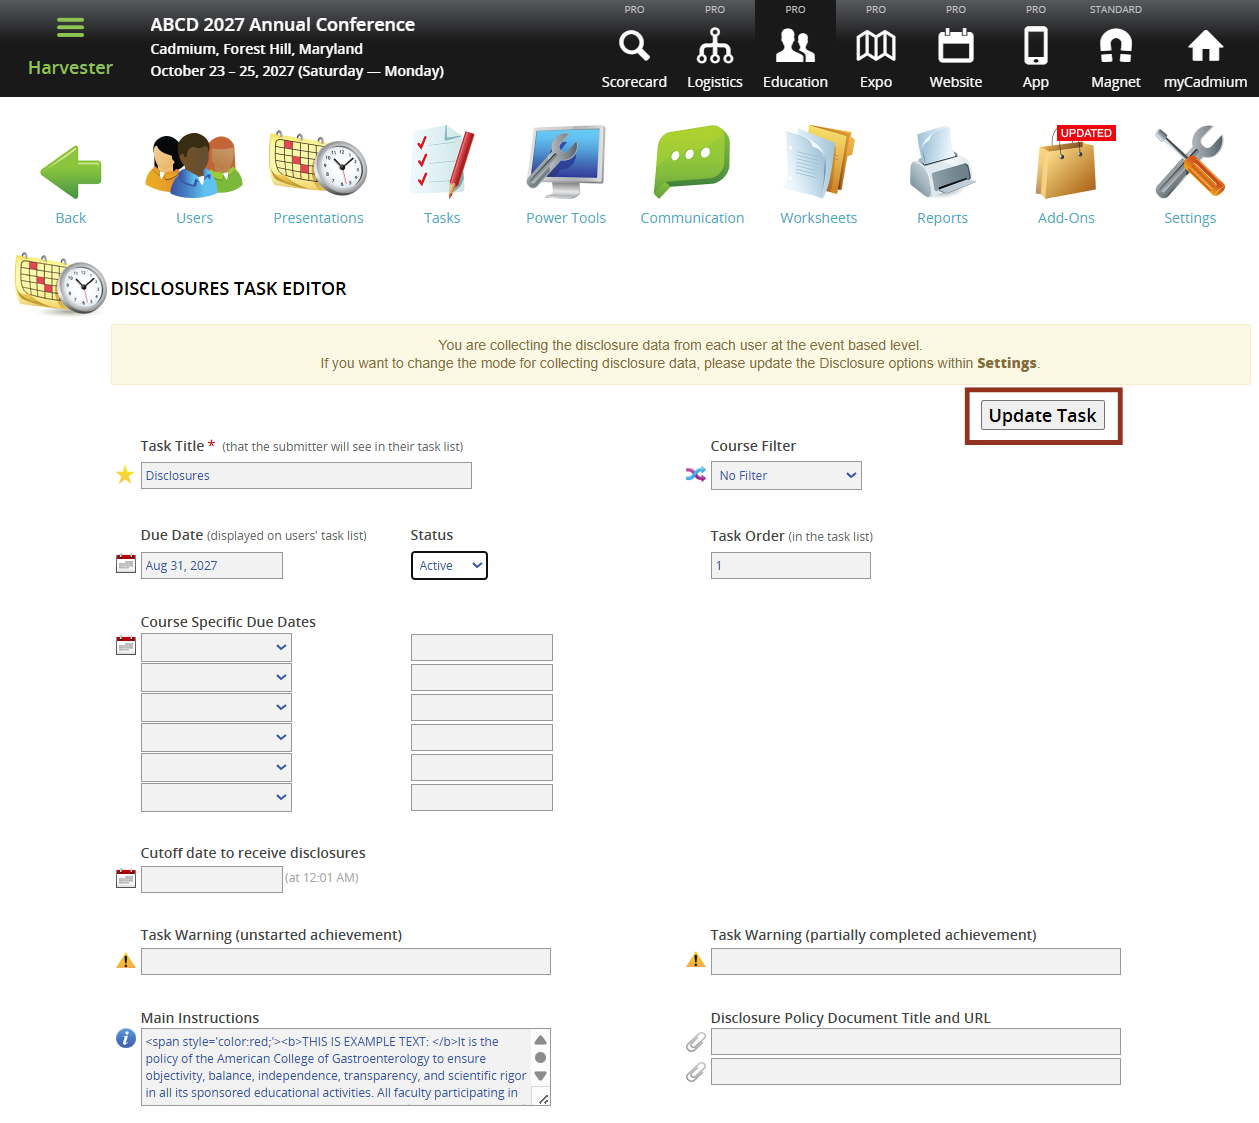
- Select Update Task in the upper right corner of the page to save your changes. If any required fields are missing, a warning message will appear at the top of your screen.
- Test the task by logging in as a user to ensure everything is working as expected.
Last modified Jun 20, 2025
Was this article helpful?
That’s Great!
Thank you for your feedback
Sorry! We couldn't be helpful
Thank you for your feedback
Feedback sent
We appreciate your effort and will try to fix the article