To get started, navigate to the Communication Module of Logistics. On the Email Campaigns page, you will see any Sent emails, Scheduled emails, Template emails, and Draft emails that have been created. Select the "CREATE NEW EMAIL" button (Fig. 1).

Fig. 1 - Communications Page Create New Email Button.
In the "Create an Email" pop-up window, enter an Email Label, choose the distribution list for the email, and the Subject line. Within Logistics, you can send emails to team members. Once all fields are complete, select the “CONTINUE’” button (Fig. 2).

Fig. 2 - Create an Email Pop-up.
Step 1 - Email Options
There are five main steps for constructing an email. The first step is to determine who the recipients of the email will be, and to schedule it, if applicable. On this step you can refine your email distribution list by using Role Filters. You can also use the 'Advanced Distribution List' link to select individual recipients from your team members list. In the CC and BCC fields, enter any email addresses, separated by semicolons, that should be copied or blind-copied on the email.

Fig. 3 - Step 1 - Email Options.
In addition, you can schedule the email to be sent at a later date. Simply toggle the "Schedule to send at later date?" drop down to "Yes." Next, fill out the Date and Time you would like to schedule the email to be sent. Then, select from a list of time zones to ensure that the email goes out according to your appropriate time zone (Fig. 4).
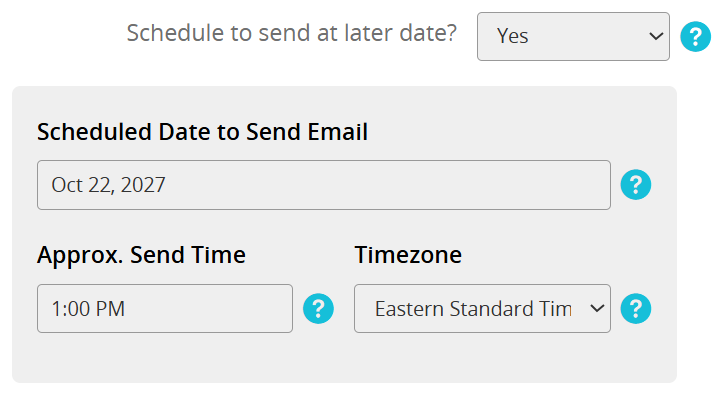
Fig. 4 - Schedule Email Option.
IMPORTANT NOTE
If you observe Daylight Savings Time, make sure to choose 'Daylight' time during the appropriate months to avoid scheduling issues.
After you have edited all fields, and, if applicable, scheduled the email, select the "Save and Continue to Step 2" button.
Step 2 - Edit Content
On Step 2, you will customize the content within the body of the email. You can choose to use hotkeys to display team member data. We also recommend to brand the email by using the Banner Hotkey at the very top of the email body.
After you have created your email body, select the "Save and Continue to Step 3" button (Fig. 5).
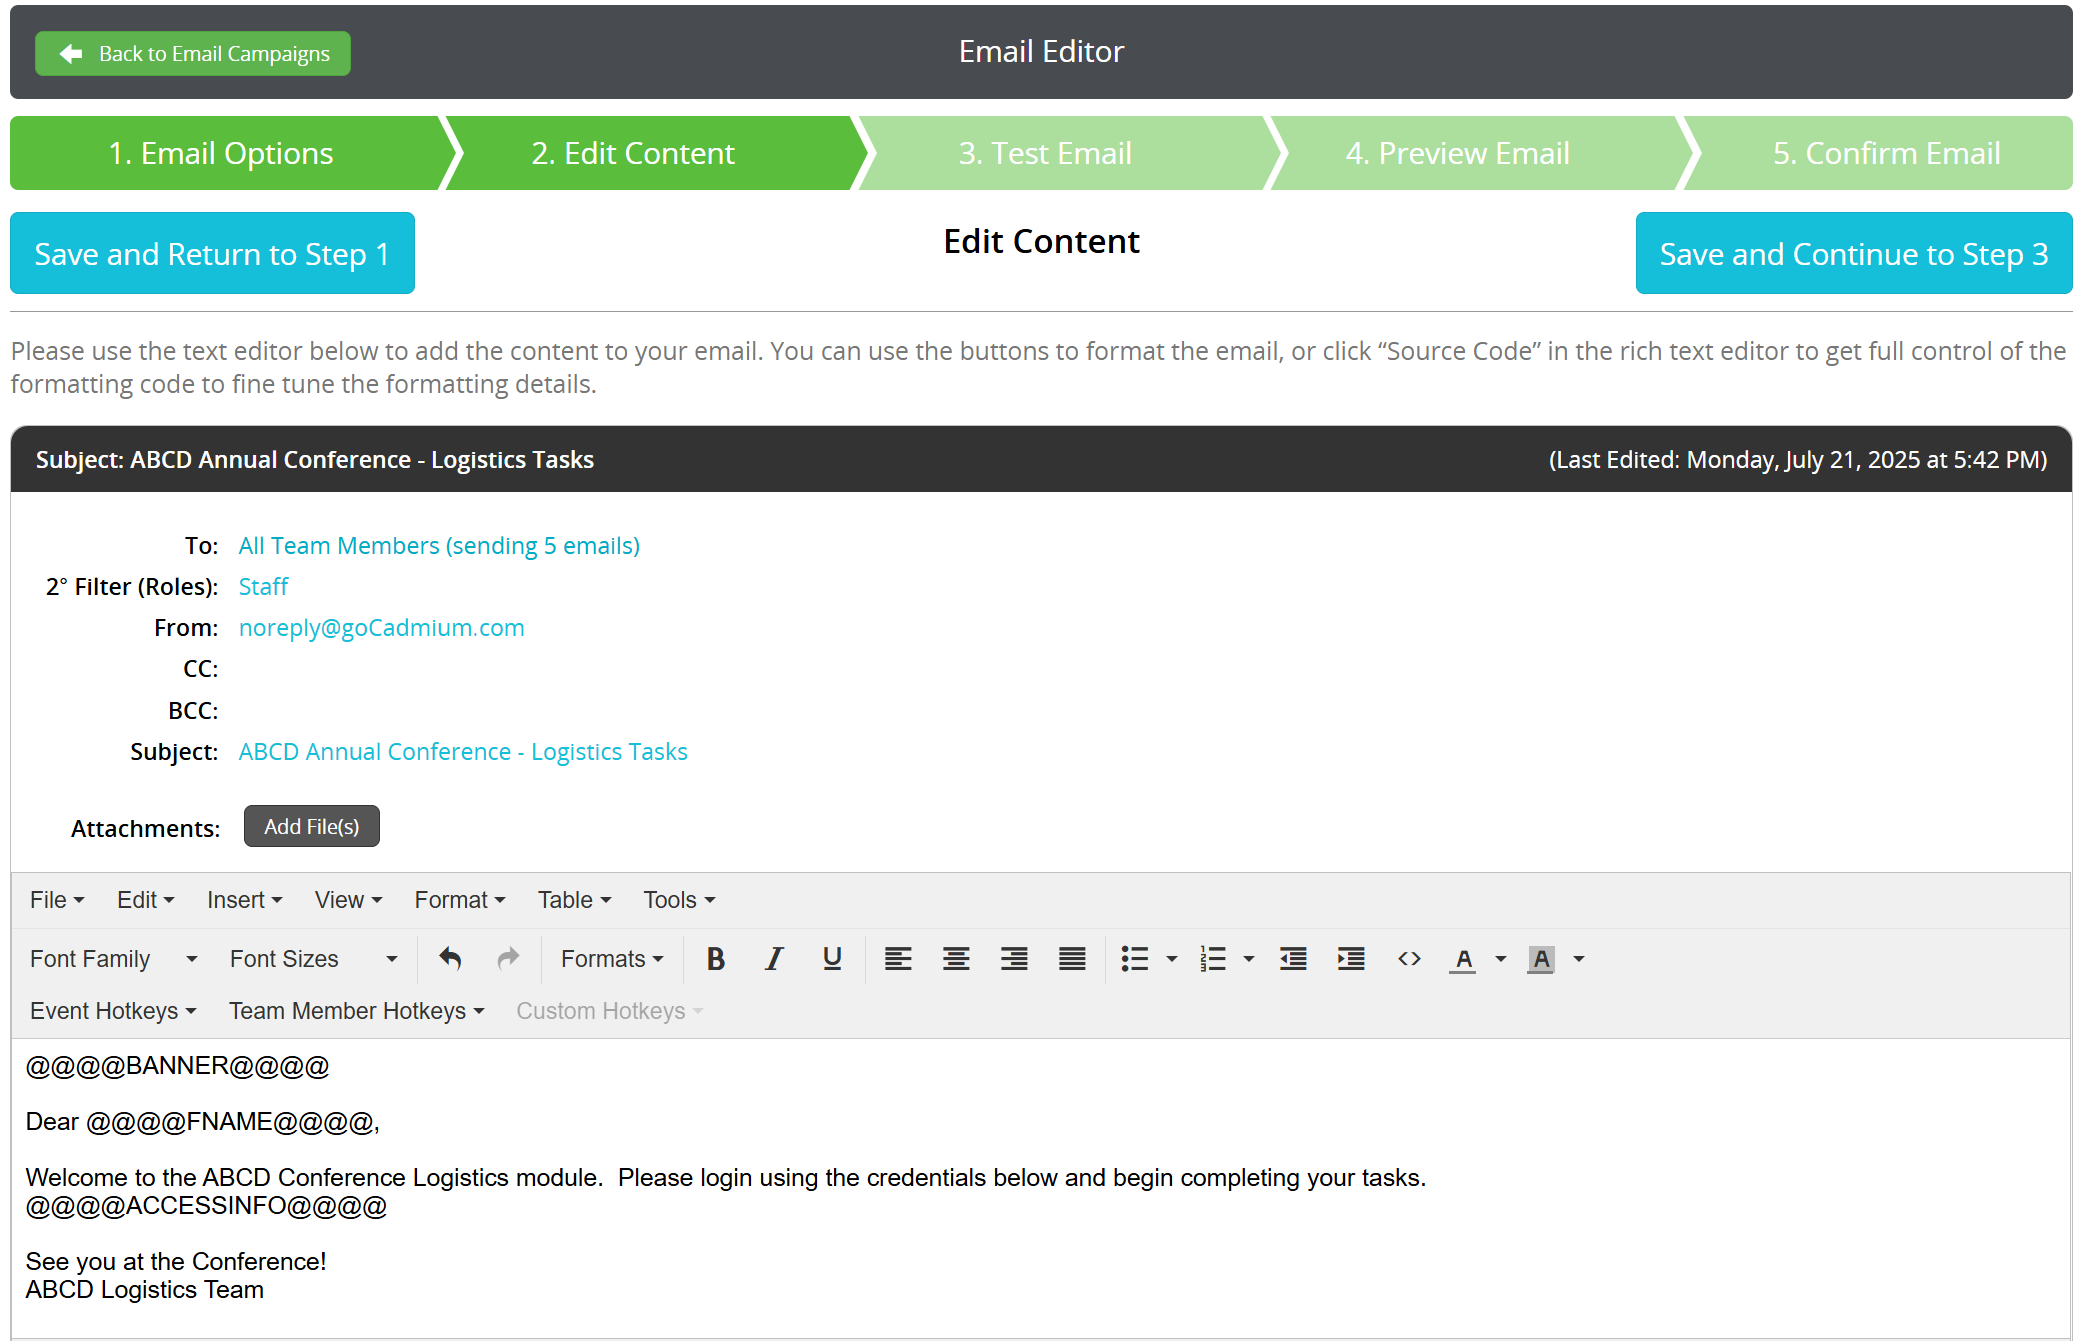
Fig. 5 - Step 2 Edit Content.
Step 3 - Test Email
The third step for creating an email within the Communication Module is to send a test email to yourself or another administrator. This will allow you to preview how the email will appear when it's received by a user.
- Add an email address to the To: field. This will default to email address for the administrator accessing Logistics.
- Check box one or more team members from your distribution list below.
- Select the "Send Test Email" button. Email(s) will be sent to the address in the TO field, and the email will show exactly how it would appear to the team members you have selected.
- After you have sent the email and confirmed accuracy, select the "Save and Continue to Step 4" button (Fig. 6).
NOTE
The team members selected will NOT receive an email. This is just for testing purposes.

Fig. 6 - Step 3 - Test Email.
Step 4 -Preview Email
On Step 4, you will see a preview of all emails that will be sent from Logistics. This will be the last step to make sure all emails are formatted correctly and the data from the hotkeys is accurate. After you have previewed all emails, select the "Save and Continue to Step 5" button (Fig. 7).

Fig. 7 - Step 4 - Preview Email.
Step 5 - Send Email
The fifth and final step is to see the final details before the email is sent or scheduled. Make sure to select the "Send Email" button before leaving this page. Emails will not be sent without clicking this button (Fig. 8).
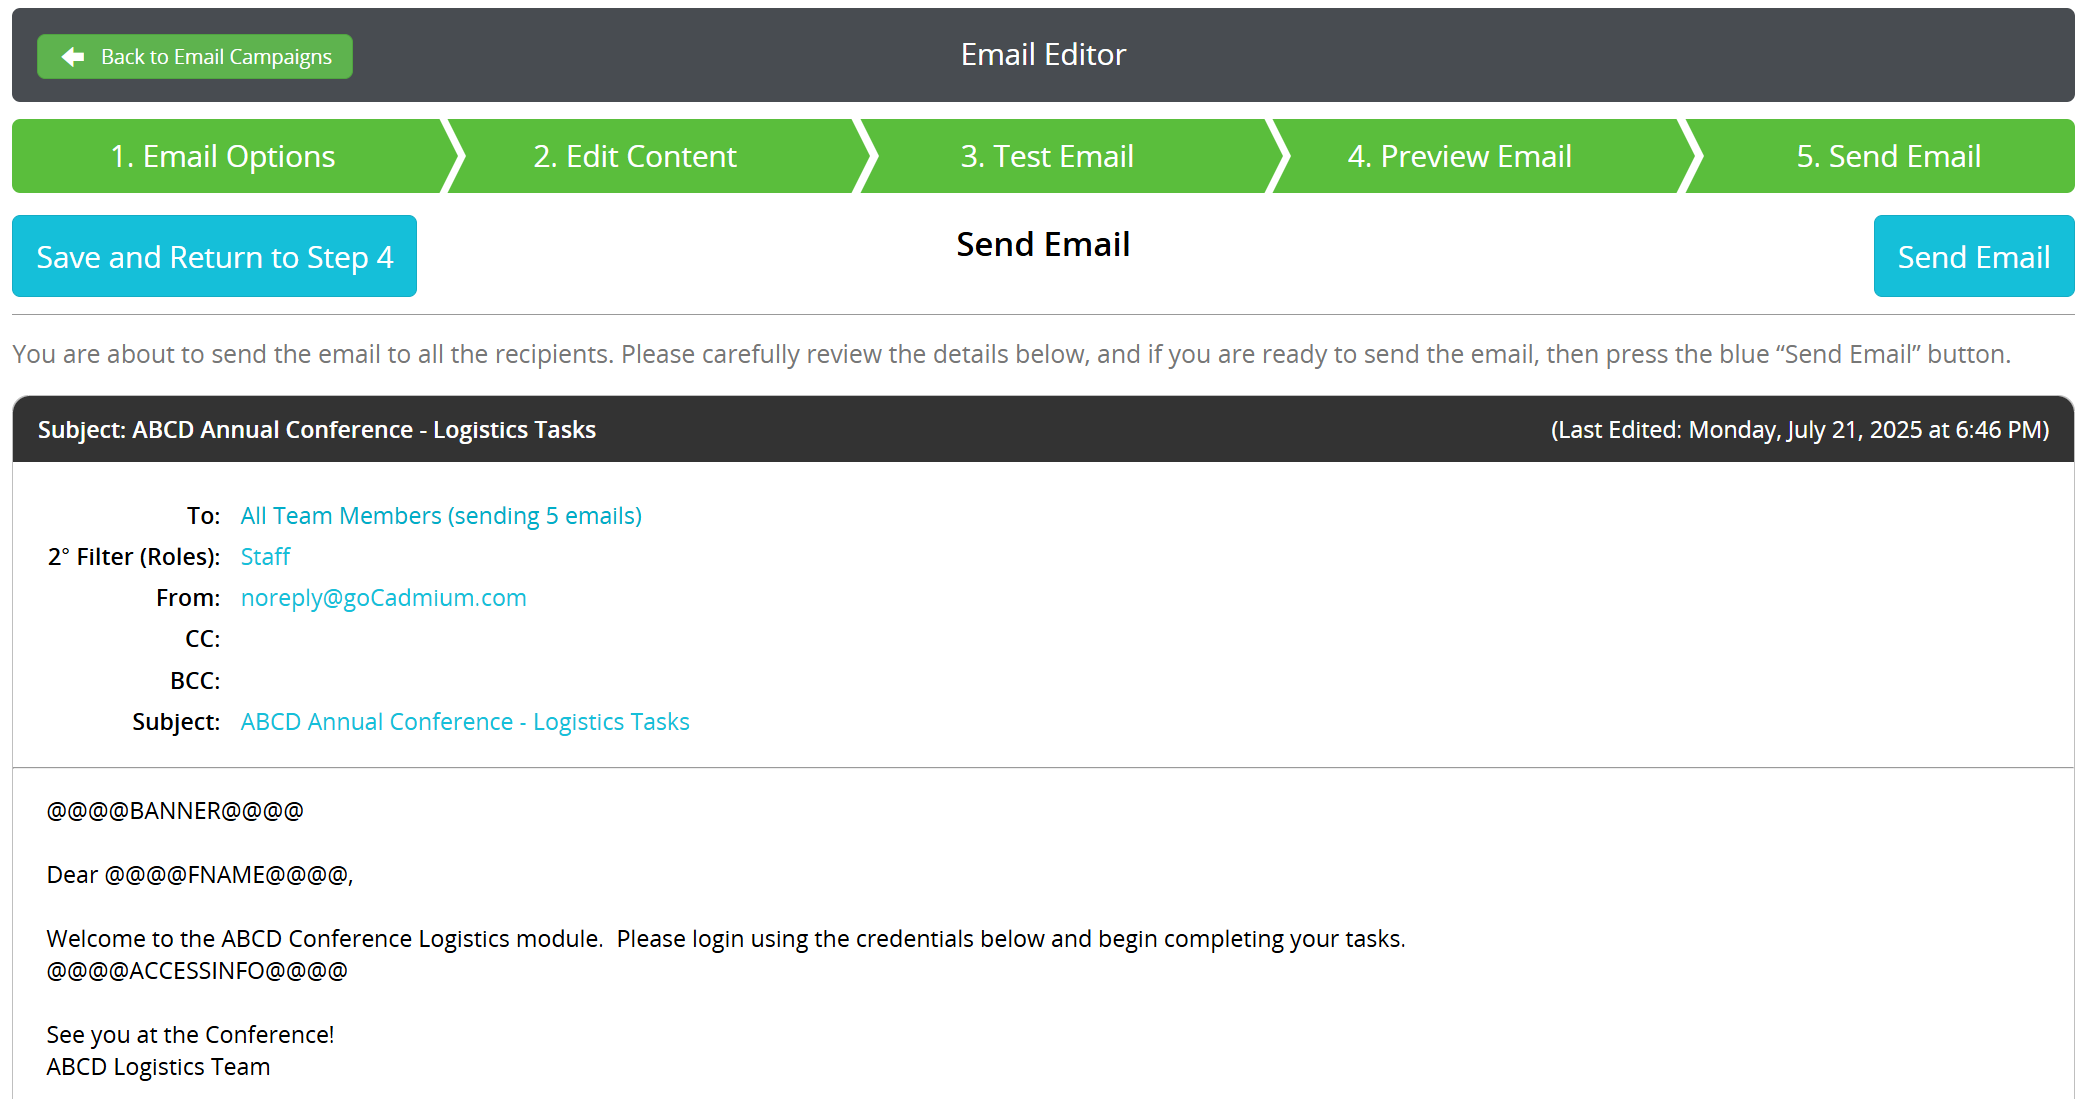
Fig. 8 - Step 5 - Send Email Button.
If you have scheduled this email to be sent at a later date, the "Send Email" button will be replaced by a blue "Confirm Scheduled Email" button (Fig. 9).

Fig. 9 - Step 5 - Confirm Scheduled Email Button.
Once you have sent or confirmed the scheduled email, you will be taken back to the Email Campaigns page. Any emails that you have sent or scheduled will be available on this page to view (Fig. 10).

Fig. 10 - Email Campaigns.
Was this article helpful?
That’s Great!
Thank you for your feedback
Sorry! We couldn't be helpful
Thank you for your feedback
Feedback sent
We appreciate your effort and will try to fix the article