To add a Presentation to a Function navigate to the "Functions" page using the icon at the top of any page in Logistics. Select a Function and select "Edit" from the row pop-up. (Fig. 1).
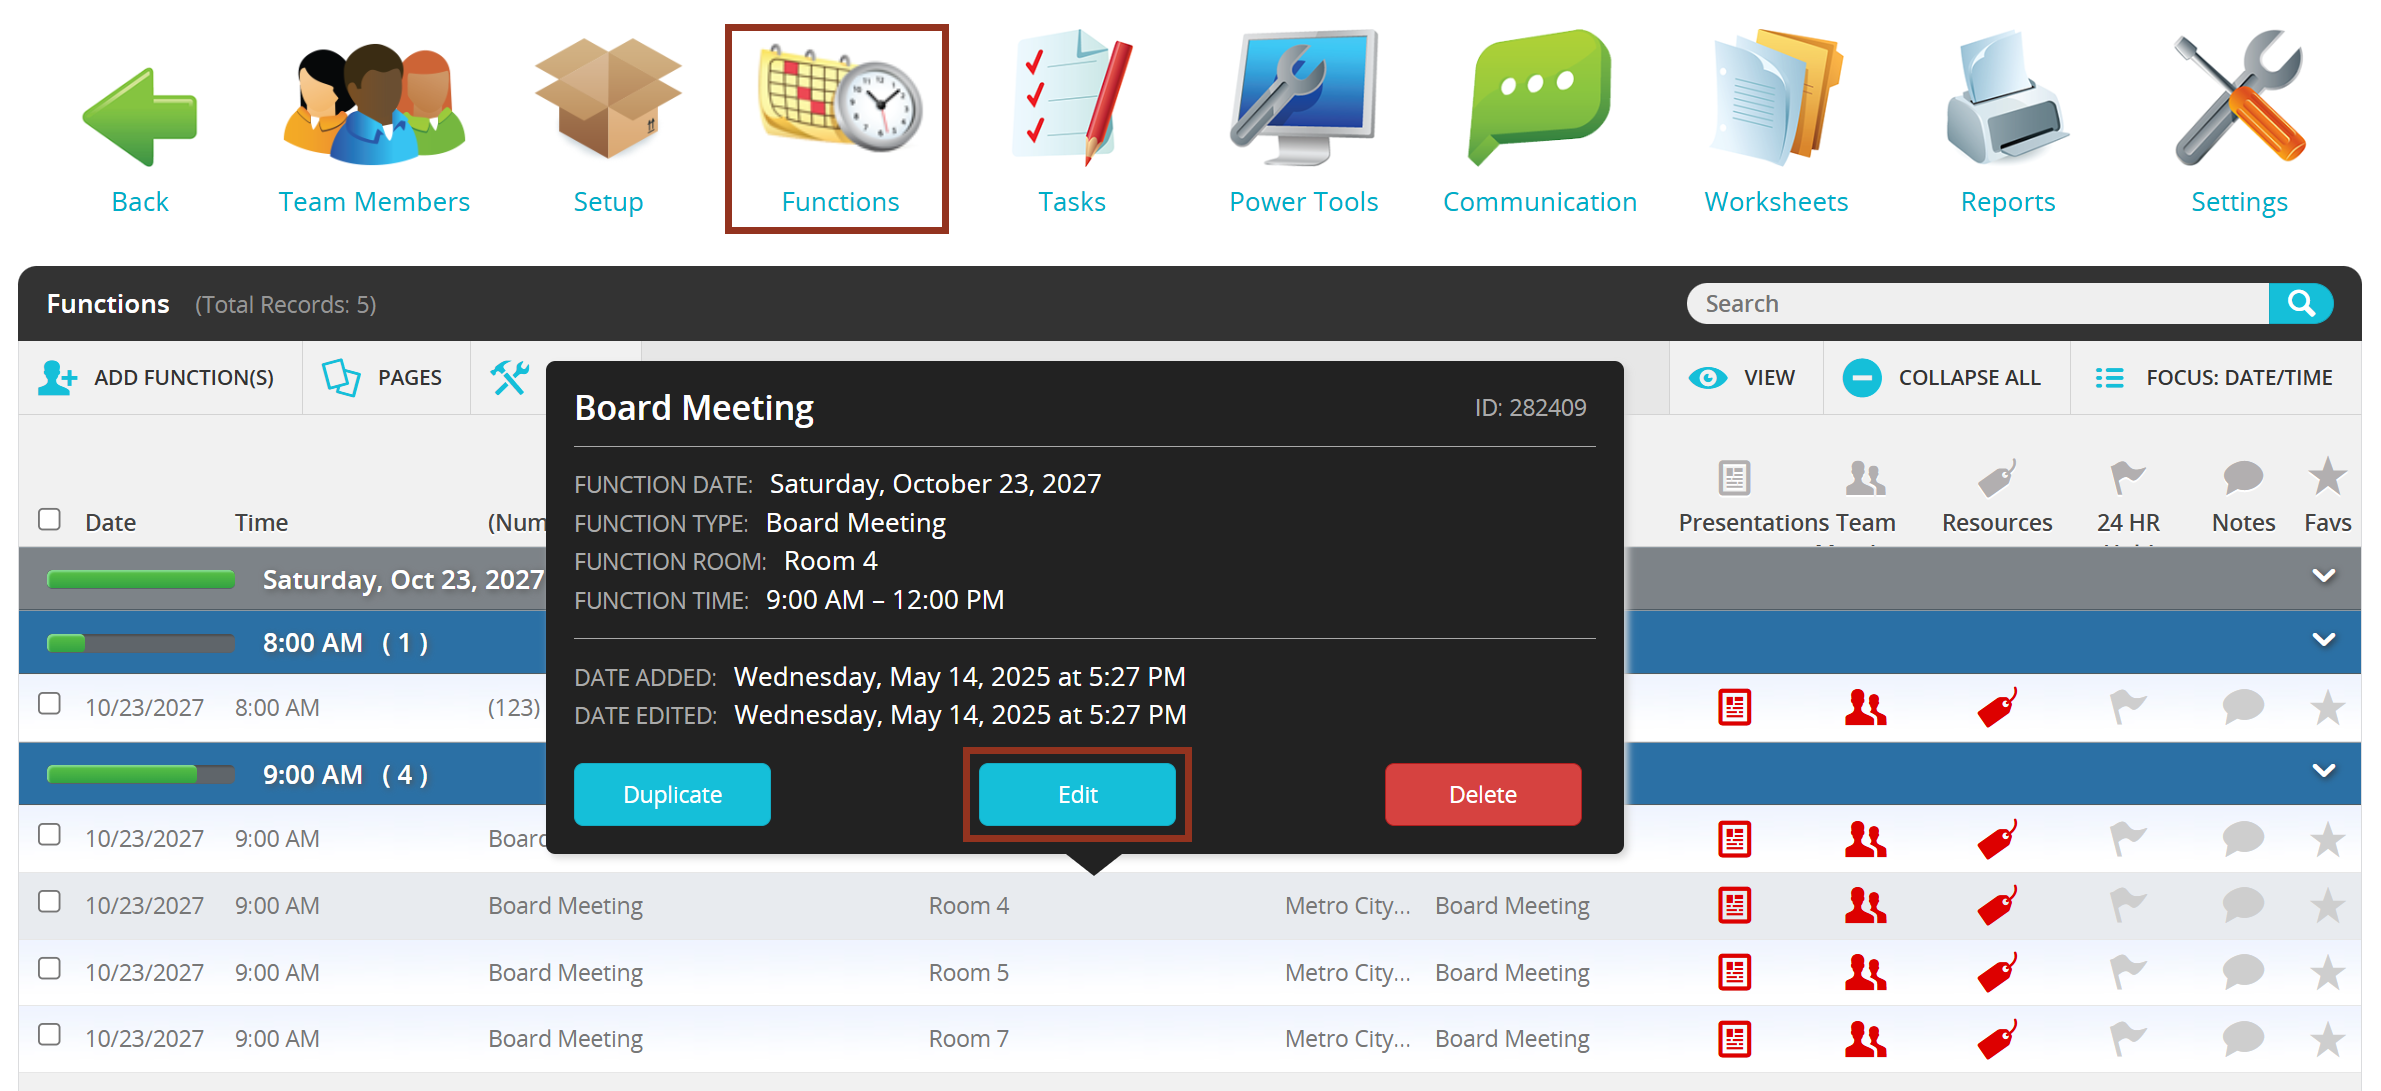
Fig. 1 - Functions Page.
Within the "Presentation(s)" left-hand navigation panel you can manually add sessions/presentations to functions. In the Education Harvester, a session is indicated by a "M" Build Code, a presentation is indicated by a “P” Build Code, and a general conference activity is indicated by a “G” Build Code.
CADMIUM RECOMMENDS
We recommend manually adding presentations to Functions for only one-off scenarios. For all other assignments, please use the Presentation Scheduler tool.
To add a presentation, select the "ADD PRESENTATION TO FUNCTION" link (Fig. 2).

Fig. 2 - Add Presentations Tab.
Next, select the Presentation Title drop down menu and start typing the name of a presentation, or choose a presentation from the list (Fig. 3).

Fig. 3 - Presentation Title Drop-down.
IMPORTANT NOTE
Only presentations that have NOT been scheduled, OR presentations that have previously scheduled start and end times (for the presentation or session) that are aligned with the Function’s start time and end time will show on this list. Presentations that have been previously assigned to a different function, OR have previously scheduled start and end times (for the presentation or session) that are not aligned with the Function’s start time and end time, WILL NOT display on the list
Next, choose a Start Time and End Time for the presentation you have selected. Then, select the gray "Add" button. The presentation will be added to the list below (Fig. 4).
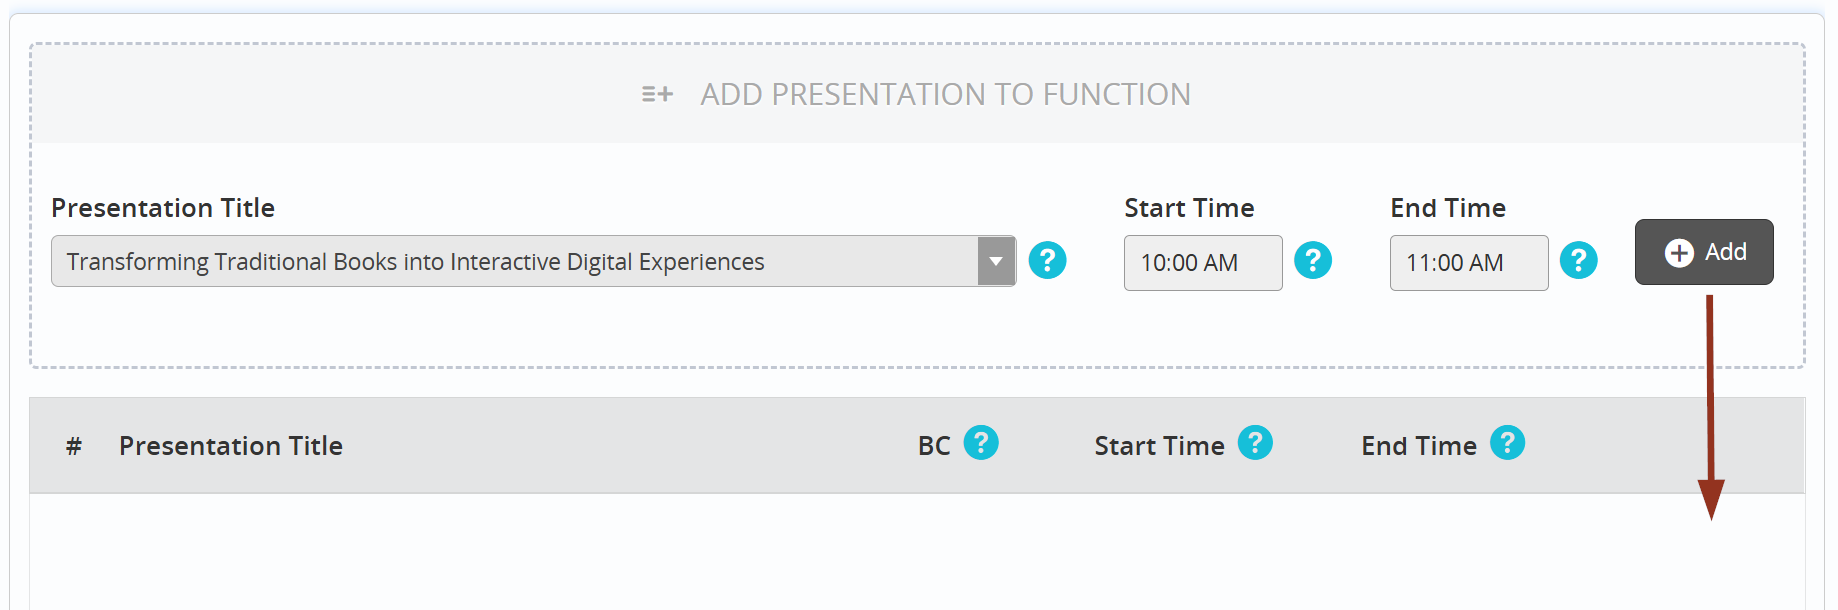
Fig. 4 - Add Button.
IMPORTANT NOTE
Use only start and end times that are aligned with the Function’s time frame. Additionally, if a presentation has previously scheduled start and end times, they will display within the fields once the presentation has been selected from the drop down menu. Any changes that you make to the times WILL be adjusted within the Education Harvester
Continue adding all presentations to the Function by repeating the previous steps. If a presentation needs to be removed from the list, select the gray “X” button at the end of the row.
If needed, enter any Presentation Notes within the Additional Information section (Fig. 5).

Fig. 5 - Additional Information Section.
Once all presentations have been added, select the "Save Changes" button (Fig. 6).

Fig. 6 - Save Changes Button.
Was this article helpful?
That’s Great!
Thank you for your feedback
Sorry! We couldn't be helpful
Thank you for your feedback
Feedback sent
We appreciate your effort and will try to fix the article