- Select On-Demand Badge Templates from the Control Center of the event in Registration, under the Check-In and Badging section.
CADMIUM RECOMMENDS
We recommend sharing this with your Onsite Technical Lead for Check-in and Badging
After the on-demand badge template is created, it must be set to the event to generate badge previews and be included in the pre-event communication message.
Setting the Template for the Event
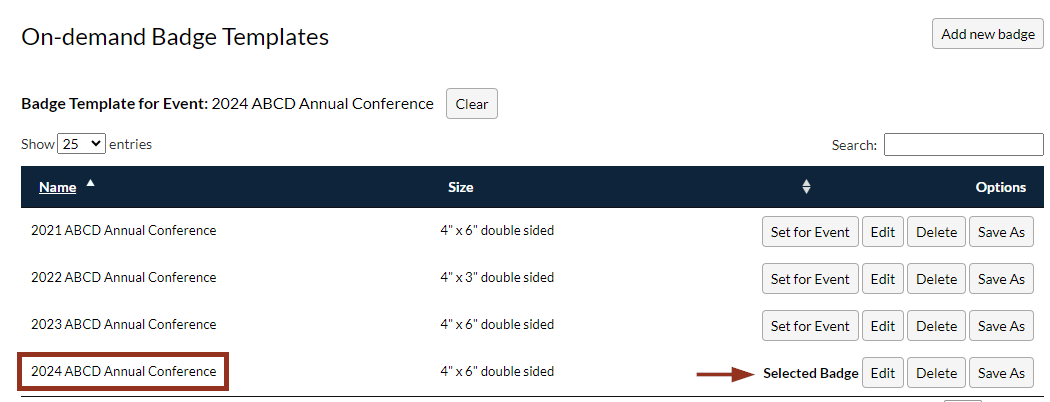
To set the on-demand badge template for badge previews and for on-demand badge printing at the Check-in kiosk:

- Select the Set for Event button next to the template that will be used for the event. The page will refresh, and Selected Badge will display on that template.

- The selected template will be listed as the Badge Template for Event at the top of the page.

Changing the Badge Template Selection
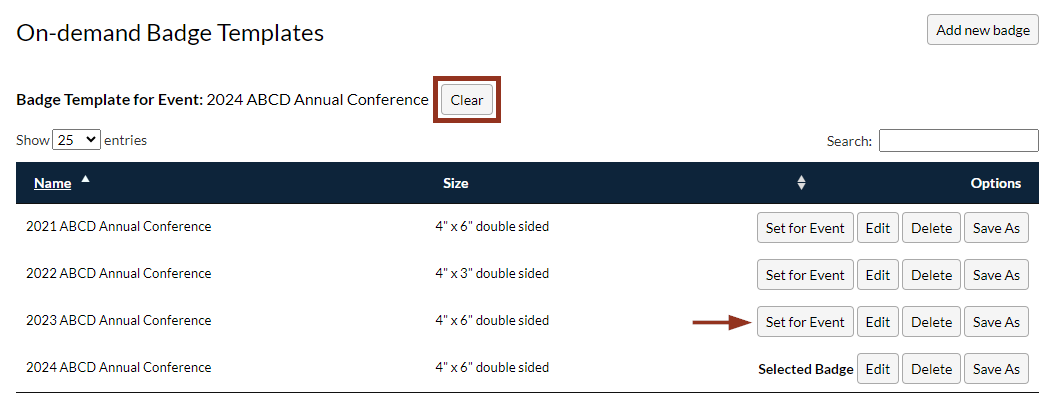
To change the selected badge template:
- Select Clear next to Badge Template for Event to remove the badge template assignment.
- Select the Set for Event button next to the new template to select a different template.

To learn more about the next steps for implementing Check-in and Badging at your event, return to the Check-in and Badging Event Organizer's Guide.
Last modified Mar 19, 2025
Was this article helpful?
That’s Great!
Thank you for your feedback
Sorry! We couldn't be helpful
Thank you for your feedback
Feedback sent
We appreciate your effort and will try to fix the article