This article outlines the setup and use of Priority Points in the Expo Harvester.
Priority Points are a way to give your companies first right of refusal for the current year by designating a date and time for them to go through the rental process to select their booth and/or sponsorships.
Process
- Setting up Priority Points
- To set up priority points within your Expo Harvester, first, click on the Worksheets icon from the Main Navigation bar at the top of the page (Fig. 1).
- From within the Worksheets module, you can then expand the Past Exhibitors bucket by clicking on the row.
- Click the Priority Points worksheet. A small pop-up window will appear. Finally, click the Run Worksheet button.
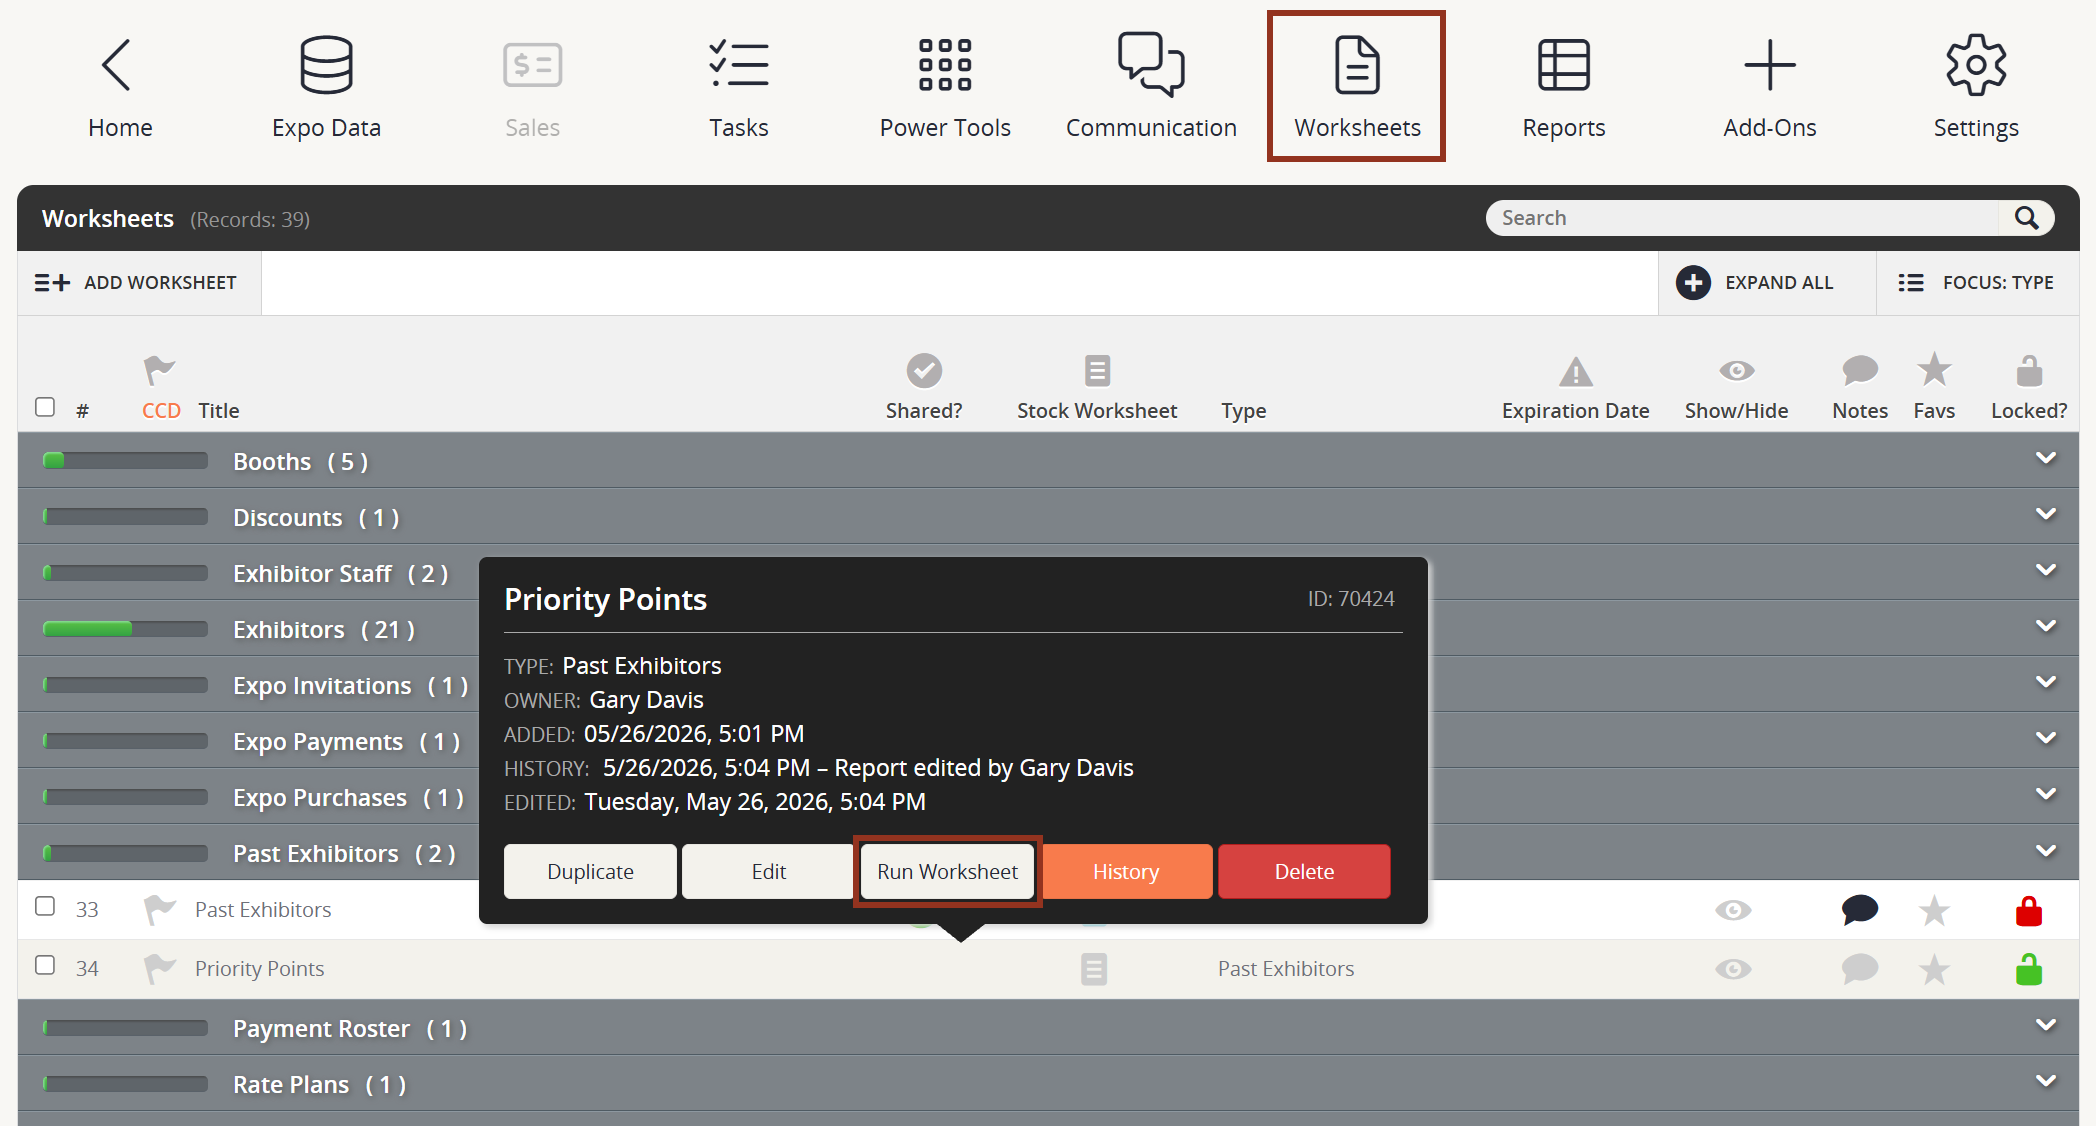
Fig. 1 - Worksheets Page Priority Points Worksheet Pop-up.
- Adding Priority Points & Rental Date/Start Time
- In the Priority Points worksheet, you will see a list of past exhibitors from your previous events. From here, you can assign them priority points in the Priority Points column and rental dates and times in the Next Expo Rental Time and Next Expo Rental Date columns (Fig. 2).
- When assigning points, dates or times, make sure that the cell you are editing turns green to indicate it has saved.
Please note:
- All times will be in EST.
- A priority point value of 0 will prevent a company from accessing the rental process.
- You can sideload this information into the Expo Harvester using an Excel sheet with these columns: Company Name, Priority Points, Next Expo Rental Date and Next Expo Rental Time. The Company Names must match your past exhibitor names exactly.
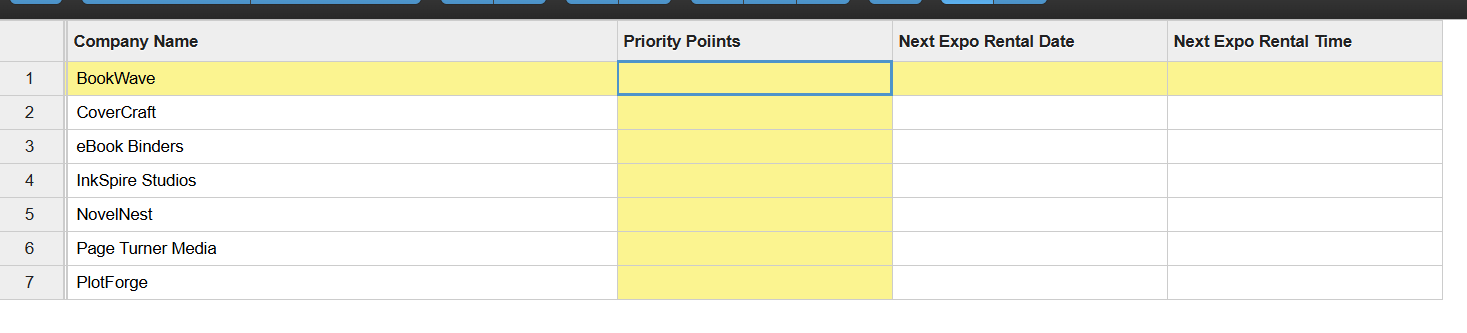
Fig. 2 - Priority Points Worksheet.
- Enabling Priority Points in Settings
- To enable the priority points, you must navigate to the Settings module via the Main Navigation bar at the top of the page.
- From the Settings page, select the Exhibitors tab, then Rental Process, and finally Booth Selection (Fig. 3).
- In the Enable / Disable section you will find a setting named "Enable Priority Rentals." If set to "Yes", the rental process will only allow exhibitors with a designated rental date and time to rent booths. If an exhibitor does not have a rental date and time, a warning message will appear at the top of their page (see step 4 for more information).
- If you do not want to use priority points past a specific date, go back to this setting and set it to "No." Priority points will then be disabled during the rental process. This is helpful if you are using priority points for first right of refusal to certain companies before opening it up to the public.
- When finished, click the Save Changes button in the top right corner of the page.
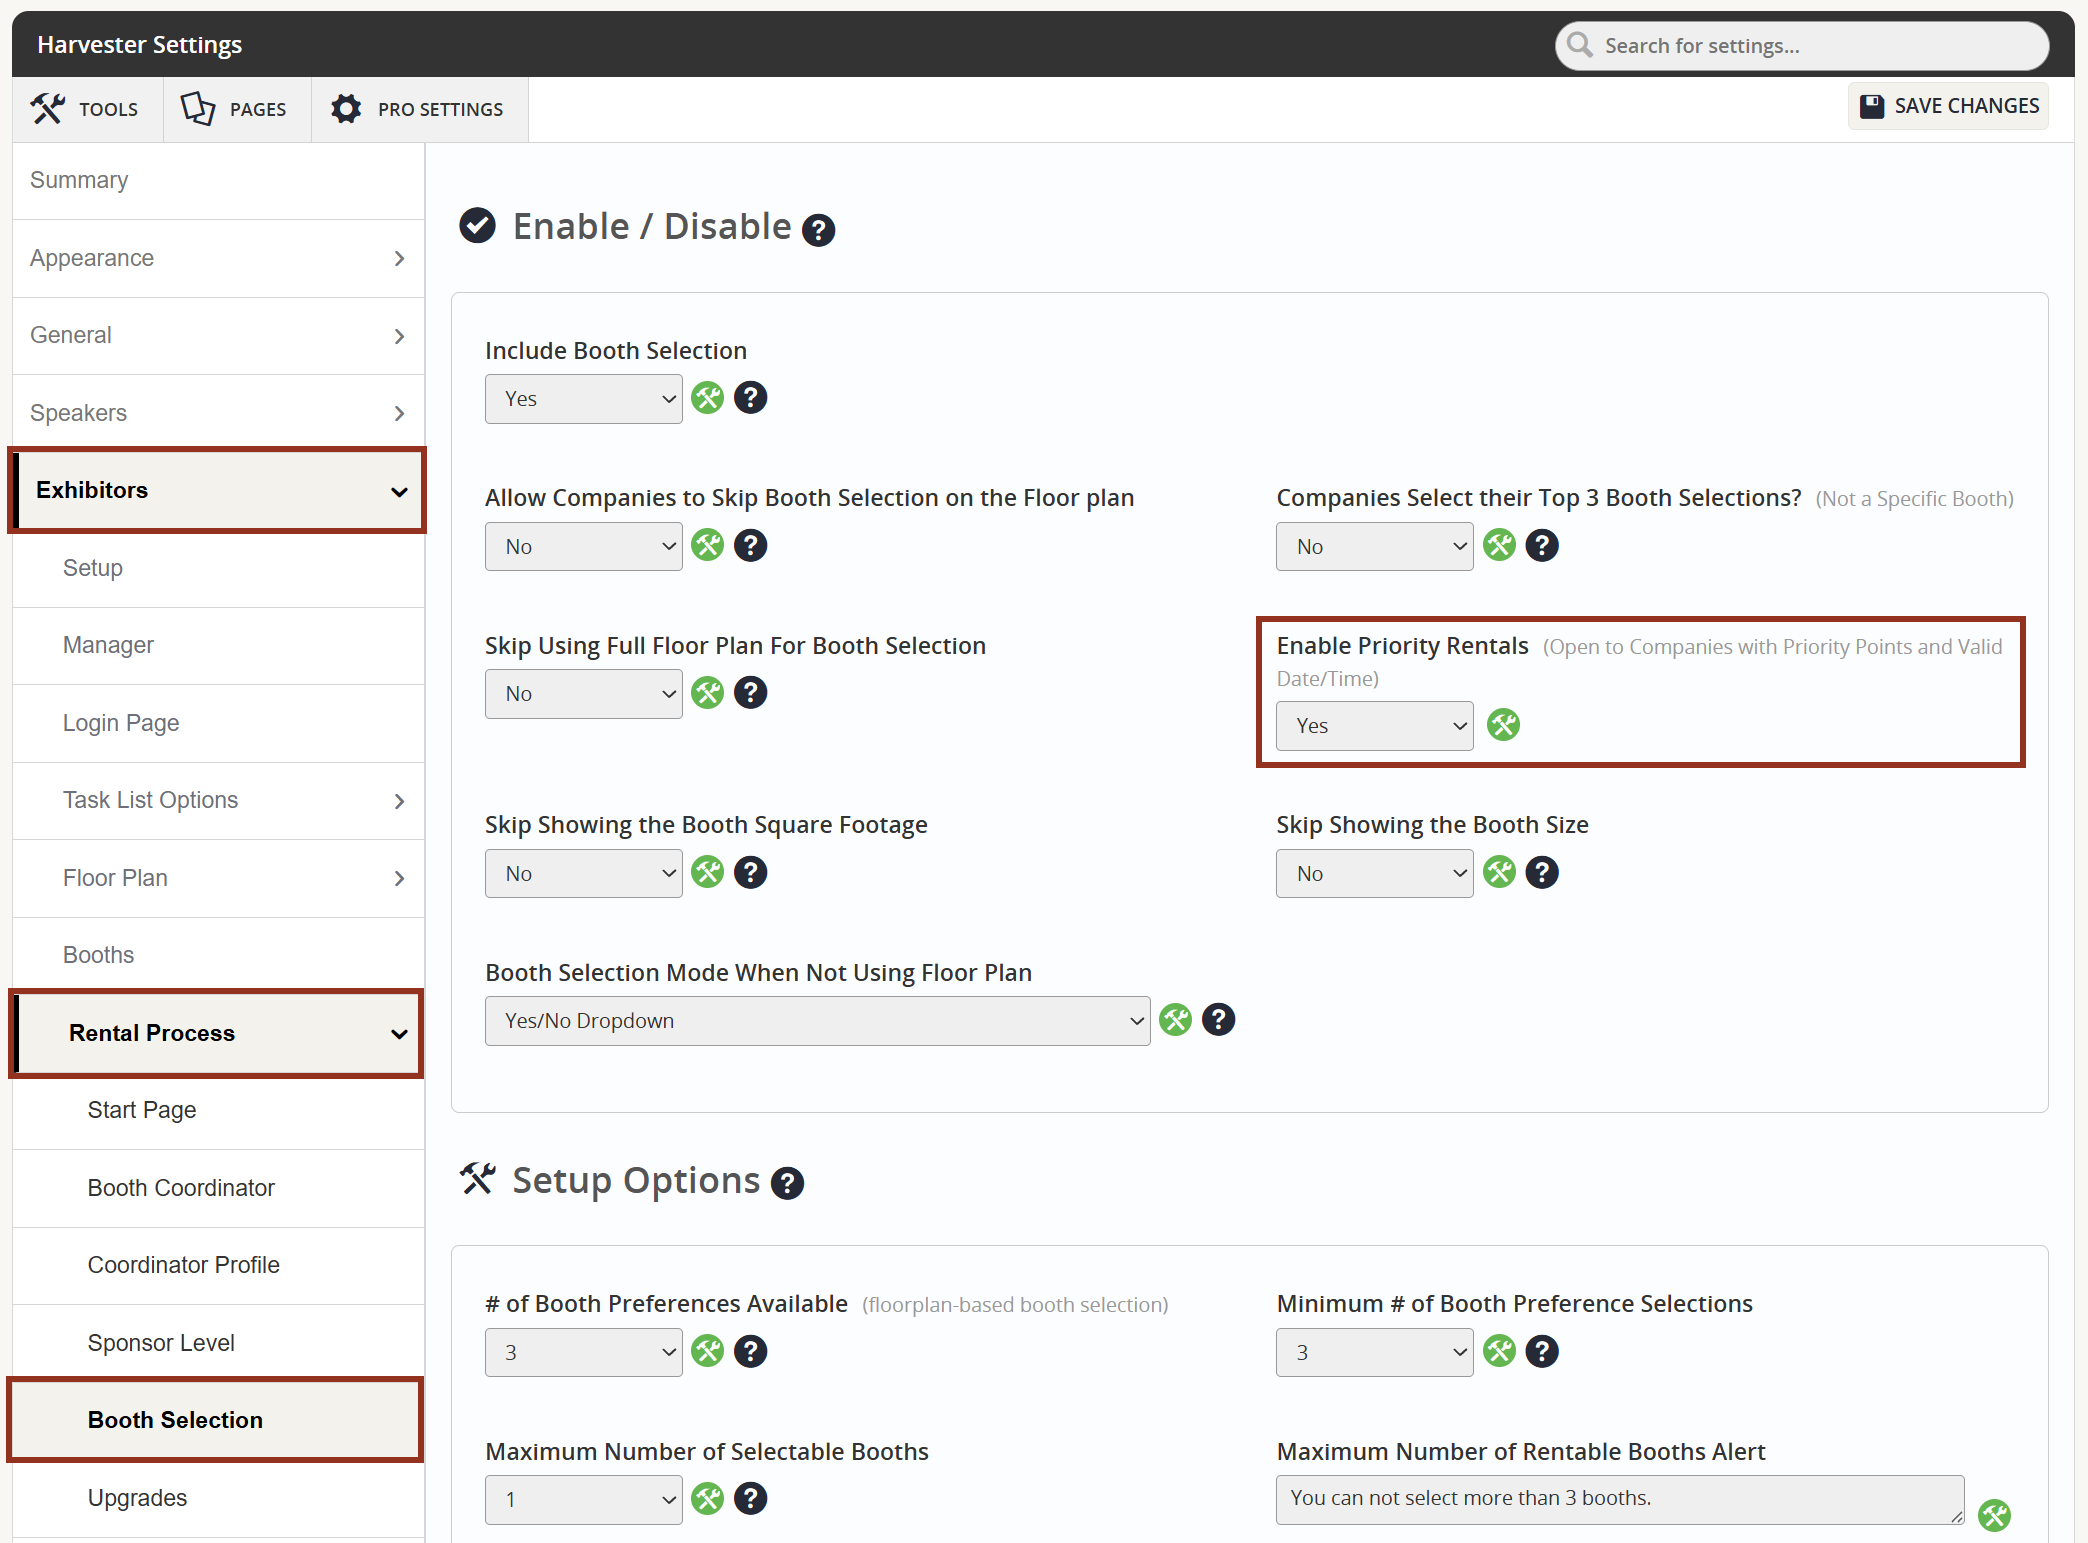
Fig. 3 - Enable Priority Rentals Setting.
- Setting up a Custom Message
- Don't forget to set up your custom message for companies who were not assigned a rental date / time. You can do this on the same Settings page under Exhibitors > Rental Process > Booth Selection (Fig. 4).
- Under the Text Options section you will find a setting titled "Message When a Company Tries to Rent but They Do Not Have Enough Priority Points or Date/Time." In this setting, you can insert three hotkeys that dynamically display the company's priority points, rental date, and rental time.
- When finished, select the Save Changes button in the top right corner of the page.
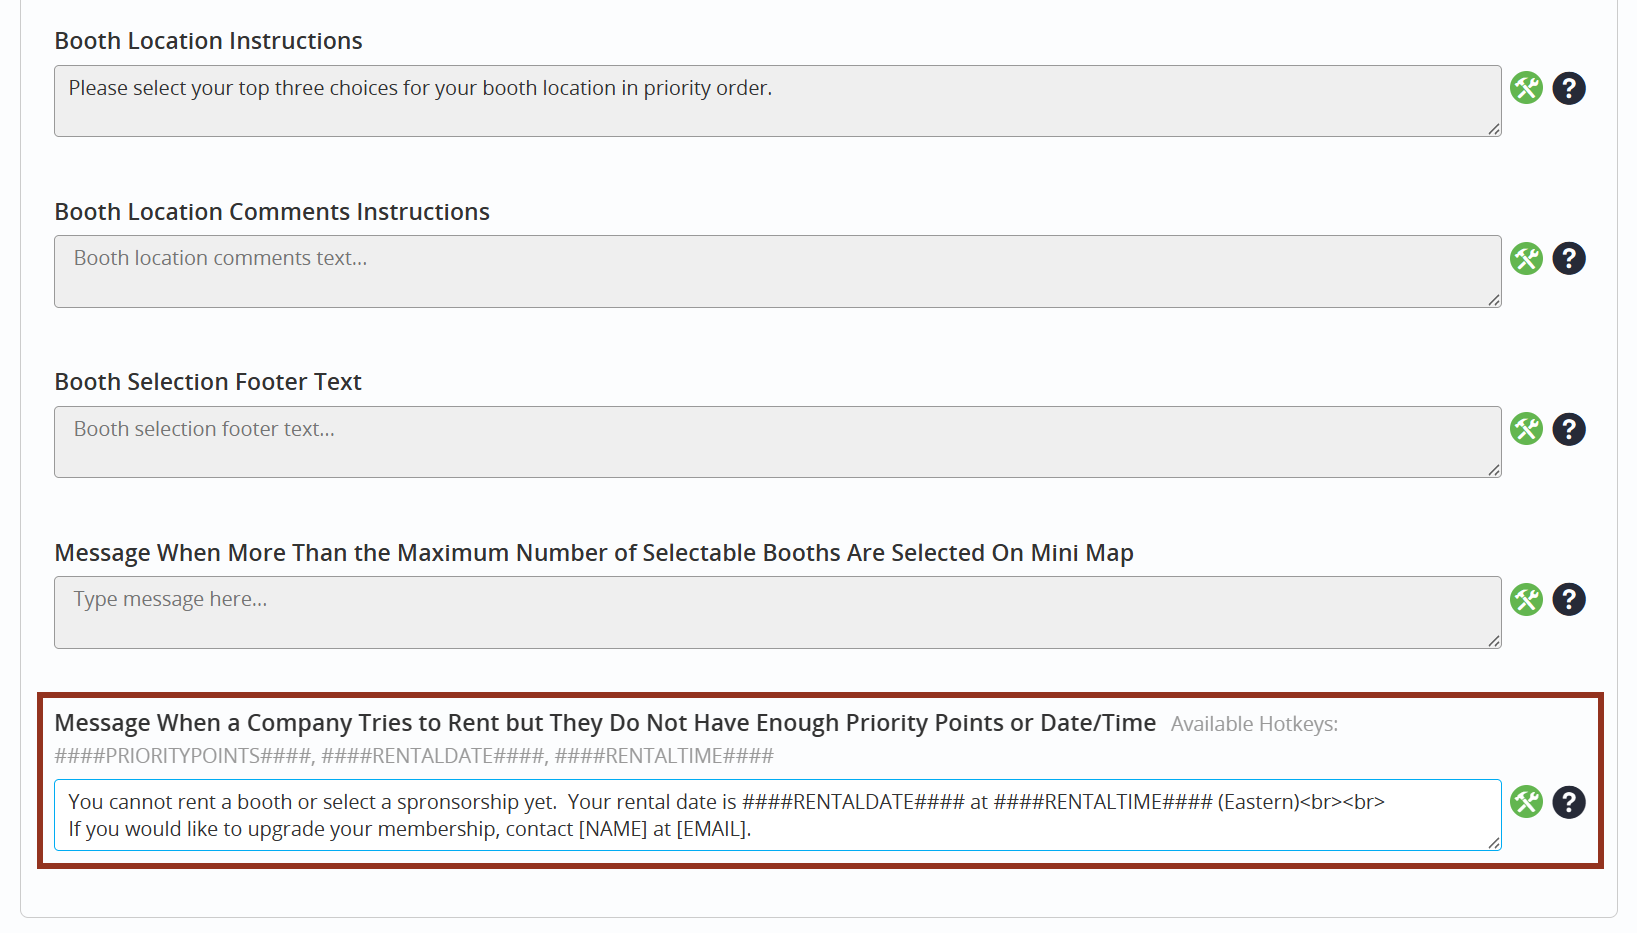
Fig. 4 - Custom Message Setting.
Last modified May 26, 2026
Was this article helpful?
That’s Great!
Thank you for your feedback
Sorry! We couldn't be helpful
Thank you for your feedback
Feedback sent
We appreciate your effort and will try to fix the article