To add a Presentation to a Function navigate to the "Functions" page using the icon at the top of any page in Logistics. Select a Function and select "Edit" from the row pop-up. (Fig. 1).
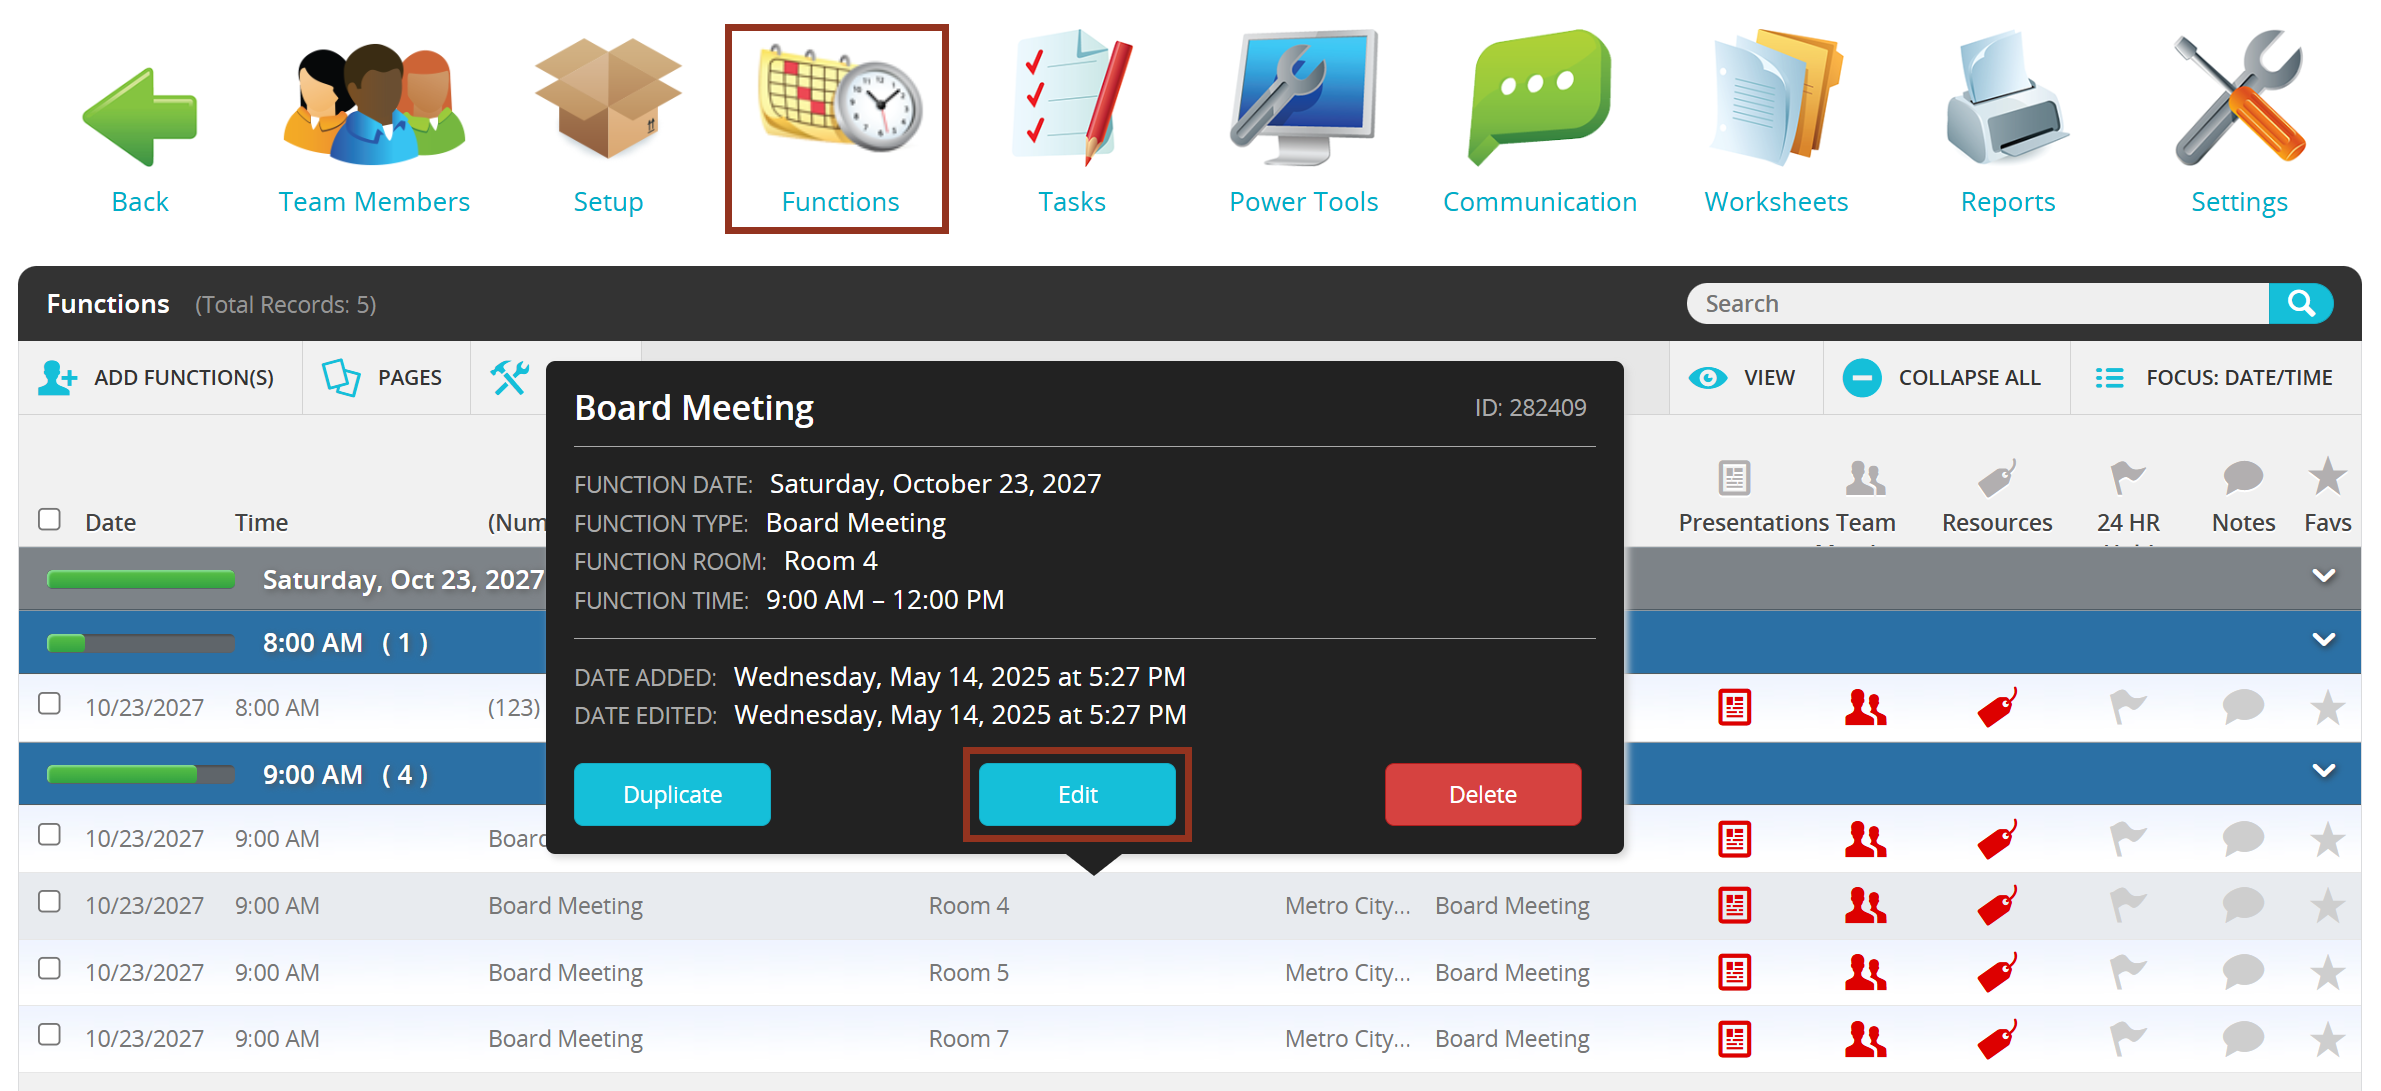
Fig. 1 - Functions Page.
Within the "Resources" left-hand navigation panel, first select "Team Members." On this page, you will indicate which Team Member Roles are needed for this Function. It is important to note that you do not need to assign Team Member names when first creating a Function. You can simply assign what Roles are needed for the Function.
To add either a Function Role or a Team Member, first select the "ADD TEAM MEMBERS TO FUNCTION" link to continue. Then, select a Role from the drop down menu (Fig. 2).

Fig. 2 - Add Team Members Tab.
NOTE
The Roles that show here are default roles that will show for all Logistics projects. If you need a new Function Role to show within this drop down, please reach out to your Project Manager via Boomerang.
After you select the Role, and if known, select the Team Member from the drop down menu. Then, select the gray "Add" button (Fig. 3). The Team Member will now be listed below.

Fig. 3 - Add Team Members Tab.
NOTE
The Function Role selected does NOT have to be the same Role tied to the user's profile. Additionally, you do NOT have to select a Team Member. You are able to add a Function Role without an assigned Team Member.
If you are ready to add Function Roles with a Team Member that is currently not on your list, first select the Function Role from the drop down menu. Then, select the "Add a new Team Member here" link (Fig. 4).

Fig. 4 - Add A New Team Member Here Link.
Within the pop-up window, enter the First Name, Last Name, Email Address and Account Role for the new Team Member (Fig 5). All other fields, including the address panel, are optional. As a reminder, the Function Role for the new Team Member does NOT have to be the same Role that you are currently adding to the Function. Then, select the "SAVE" button to continue.
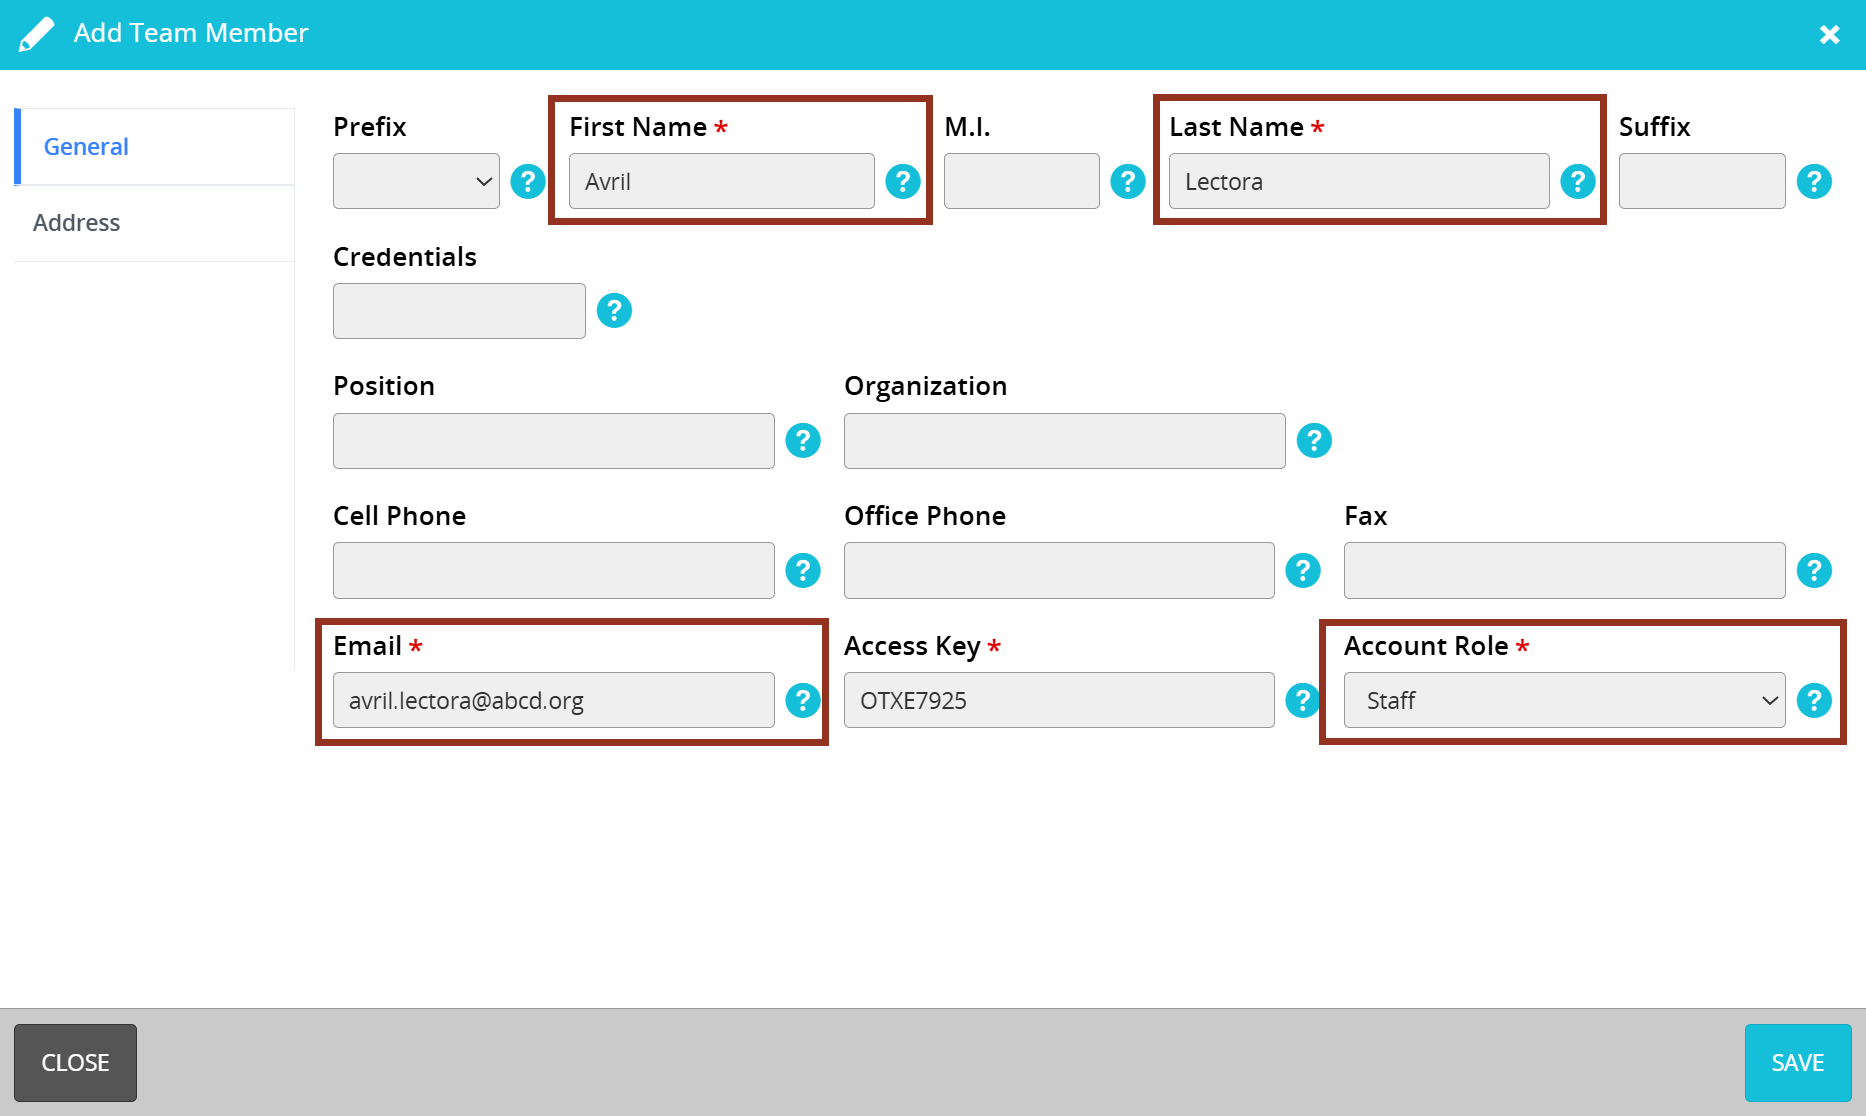
Fig. 5 - Add Team Member Pop-up.
A pop-up message will appear indicating that the Team Member was added successfully (Fig. 6). This means that the newly added Team Member from within the Function editor, will now be listed as a user on the Team Members page. Moving forward, this Team Member will also be available to add to other Functions. Then, select the gray "Add" button to add the Team Member to the Function.

Fig. 6 - Confirmation Pop-up.
Continue adding all Function Roles, with or without assigned Team Members, to the Function by repeating the previous steps. If a Role/Team Member needs to be removed from the list, select the gray "X" button at the end of the row. If needed, enter any Team Member Notes within the Additional Information section.
Once all Roles/Team Members have been added, select the green "Save Changes" button. A green confirmation banner will appear briefly at the top of the page. (Fig. 7).
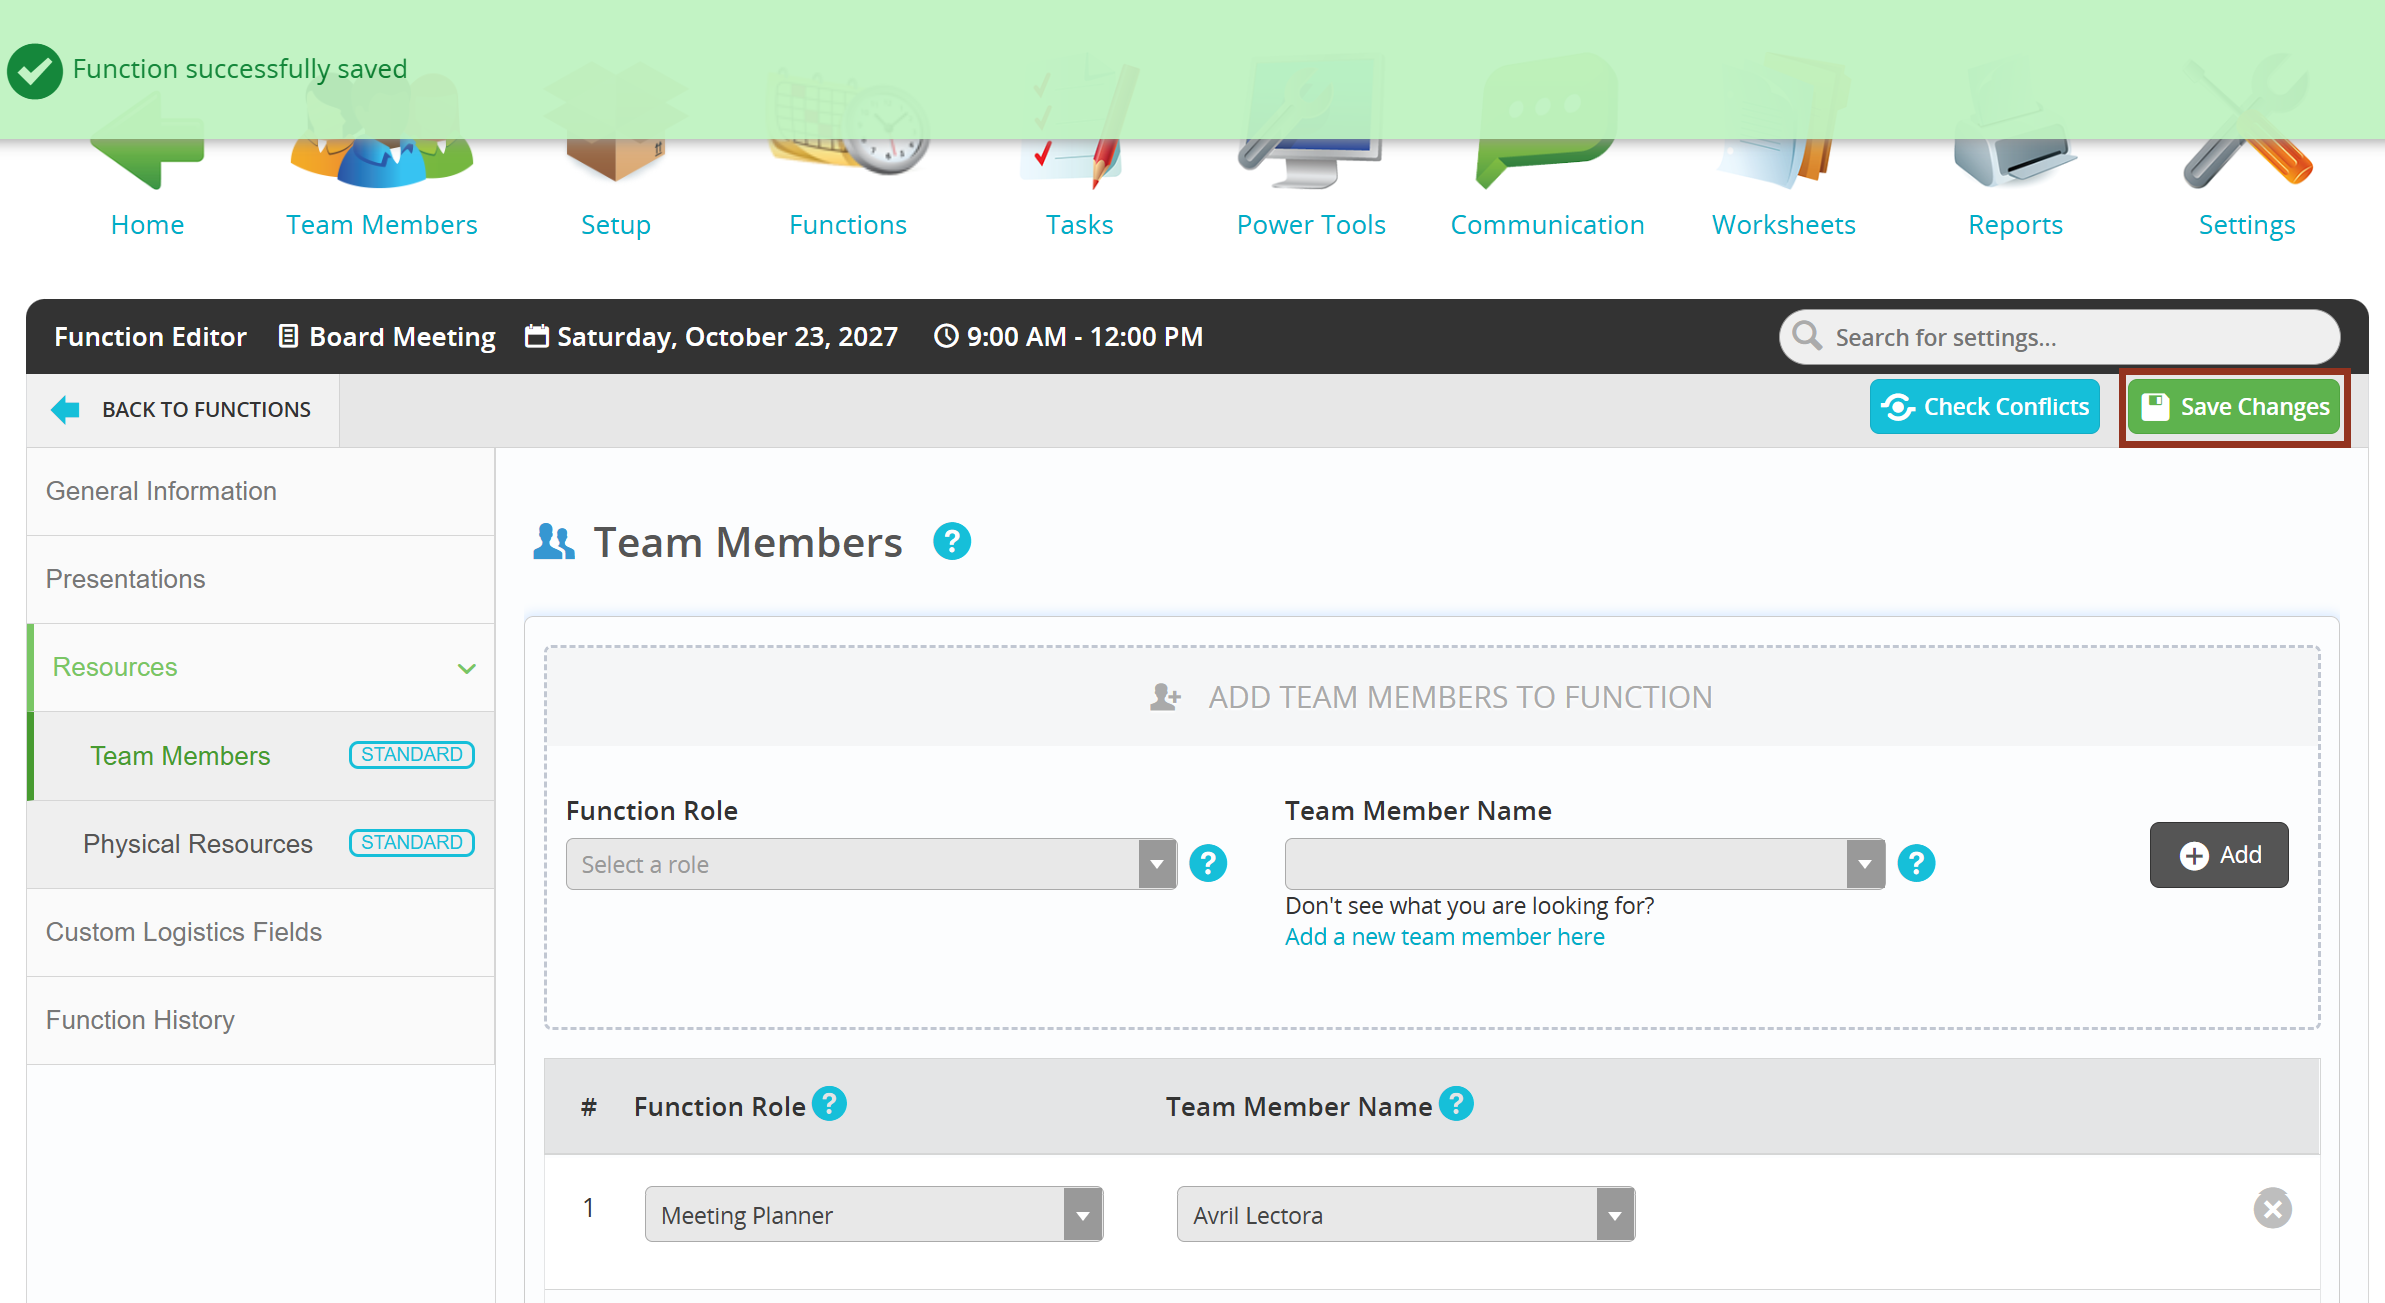
Fig. 7 - Save Changes Button.
Was this article helpful?
That’s Great!
Thank you for your feedback
Sorry! We couldn't be helpful
Thank you for your feedback
Feedback sent
We appreciate your effort and will try to fix the article