To update the Universal Team Member Role Filter navigate to the Settings page by selecting the Settings icon at the top right on any Logistics page (Fig. 1).

Fig. 1 - Settings Page Icon.
Then, select the "Logistics" tab on the left-hand navigation panel. Next, select "Role Filter." To add or remove a team member role, select the check box to the left of the role. This action will either add or remove the role that is available on the team members account pop-up and within the function editor. Select the "Save Changes" button (Fig. 2).
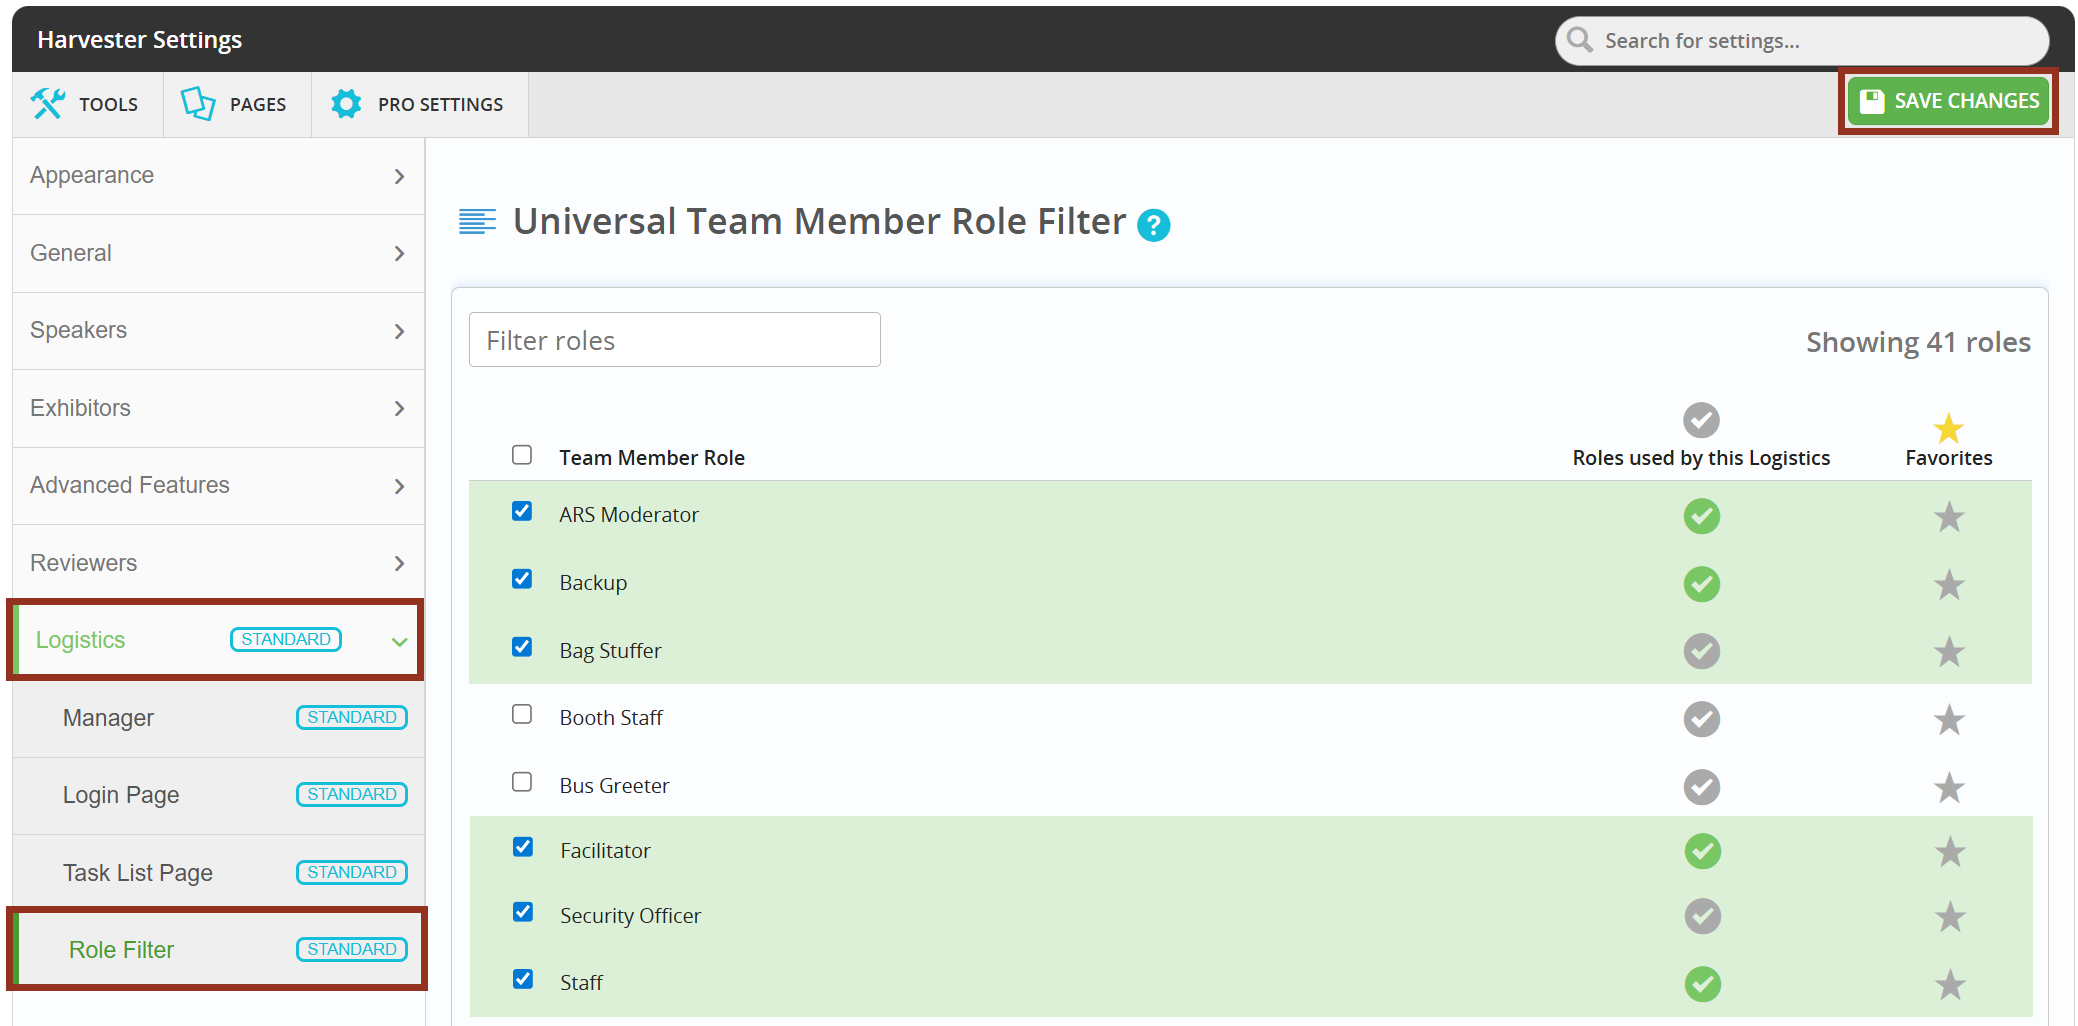
Fig. 2 - Logistics Role Filter Settings.
Any roles with green check marks indicate the roles that are currently being used in Logistics. For example, in the screenshot above, the role "Security Officer" is available to be used. However, there is not a team member that has the account role or function role of "Security Officer."
Was this article helpful?
That’s Great!
Thank you for your feedback
Sorry! We couldn't be helpful
Thank you for your feedback
Feedback sent
We appreciate your effort and will try to fix the article