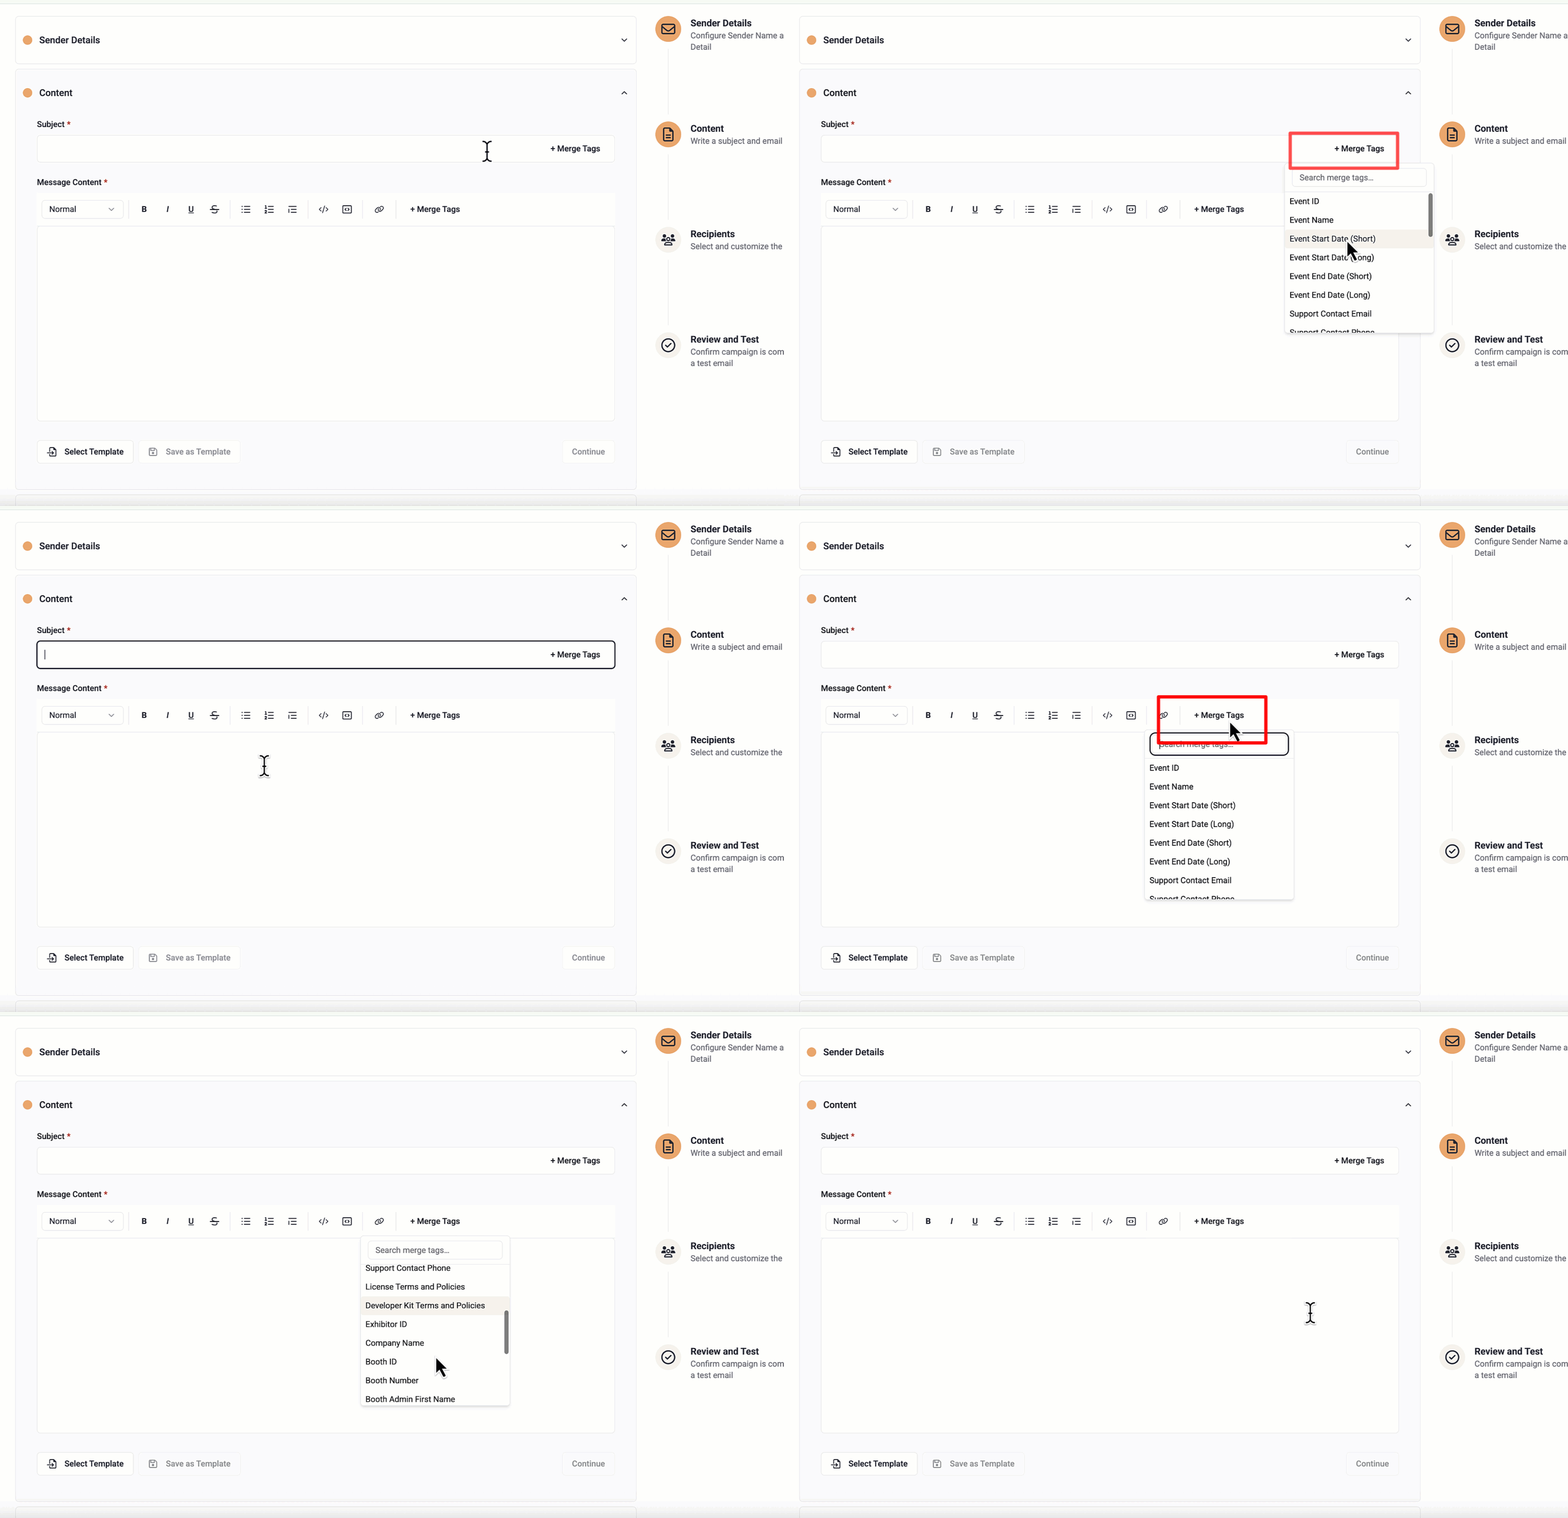
- Place your cursor in the subject or body where you want the personalized value to appear.
- Click the merge tag button in the toolbar.
- Select the fields you want to add.
The Content step is where you write the email itself. It includes a subject line field, a rich-text message editor, and options for using and saving templates.
Subject line
Type your email subject in the Subject field. You can personalize it using merge tags — click + Merge Tags to see what dynamic fields are available, such as the recipient's company name or booth number.
Message body
Use the rich-text editor to write your message. The toolbar provides the following formatting controls:
| Control | What It Does |
| Body (style dropdown) | Sets the paragraph style (normal, heading, etc.) |
| B / I / U / S | Bold, italic, underline, and strikethrough |
| List icons | Unordered (bullet) list and ordered (numbered) list |
| ≡→, Blockquote | Toggle a block quote |
| </>, Code Block | Toggle a fenced code block |
| [<>], Inline Code | Toggle inline code formatting |
| Link icon | Insert or edit a hyperlink |
| + Merge Tags | Insert a dynamic field replaced with each recipient's data when sent |
Personalizing with Merge Tags
Merge tags let you insert recipient-specific information directly into your subject line or email body. When the email is delivered, the merge tag is automatically replaced with the real value for that recipient, so every attendee receives a personalized message.
The following merge tags are available:
- Event Name
- Event Start Date (Short)
- Event Start Date (Long)
- Event End Date (Short)
- Event End Date (Long)
- Support Contact
- Email Support Contact Phone
- License Payment Terms & Policies
- Developer Kit Payment Terms & Policies
- Company Name
- Booth Number
- Booth Admin First Name
- Booth Admin Last Name
- Exhibitor Login URL
- Lead Capture Type
- Developer Kit API Key
- License Activation Code
- Total License Quantity
- Not Activated License Quantity
- Activated License Quantity
How to Insert a Merge Tag
Example
Hi {{Booth Admin First Name}},
We’re excited to welcome your {{Company Name}} to {{Event Name}}!
Templates
- Select Template — Load a previously saved message template into the editor, replacing the current content. Useful for recurring campaigns with a standard format.
- Save as Template — Save the current subject and body as a reusable template for future campaigns.
When you are happy with the content, click Continue to proceed to Step 3 — Recipients.
Insert an HTML block
Add custom HTML directly to your message, personalize it with merge tags, and save it as a message template.
- In the formatting toolbar, select Insert HTML.
- Paste or type your HTML.
- Select Insert.
- Review the HTML preview in the rich text editor.
- Select Edit or Remove to change it.
The rest of your message, outside the HTML block, continues to use the standard editor.
For your security, unsafe code such as scripts is removed automatically before your message is sent.
Merge tags in an HTML block
Include merge tags inside an HTML block by selecting + Merge Tags or typing it as {{Tag Name}}.
Keep each merge tag whole. If you change or delete any part of a tag, it will break and display as plain text, exactly as written. For example, {{First Name}} with a missing bracket sends as {First Name}}.
You can turn a merge tag into a clickable link. For example, to link the Exhibitor Login URL merge tag, insert:
<a href="{{Exhibitor Login URL}}">Log in to the Lead Capture Portal</a>
Merge tags fill in only when the message is sent, so they cannot be previewed in the rich text editor. This includes links built from a merge tag. Send yourself a test email to confirm your merge tags and links work.
CADMIUM RECOMMENDS
AI tools can help convert your email content into HTML. Paste your content and ask it to convert the text to email-ready HTML, keeping any merge tags in the {{Tag Name}} format. Then paste the result into the HTML block and send yourself a test email to confirm it looks right.
Last modified Aug 17, 2026
Was this article helpful?
That’s Great!
Thank you for your feedback
Sorry! We couldn't be helpful
Thank you for your feedback
Feedback sent
We appreciate your effort and will try to fix the article