- Open the Recent Chat List.
- Select the pencil icon.
- Search for the attendee you want to message.
- Select their name.
- Type your message and select the blue arrow to send.
Using the Chats feature, attendees can connect and network with other attendees during the event by sending and receiving messages with attendees who have opted to share their profiles.
NOTE
Note: Some events may not offer the ability to chat on the website.
How to Enable the Chats Feature and Be Discoverable
To participate in Chats, you must share your profile. By default, attendee profiles are not shared until you choose to do so. You can opt in by following these steps:
Enable Profile Sharing at Login
After logging in to the website:
- You will be prompted to complete your profile.
- On the profile setup Networking page, select the checkbox for “Share your profile with attendees and exhibitors."
- Once shared, your profile will appear in the Attendee List, and you will be discoverable for messaging.
Enable Profile Sharing via My Conference Profile
- Select the dropdown next to your name in the top right.
- Select My Conference Profile.
- Select "Save and Continue" until you reach the Networking page.
- Check "Share your profile with attendees and exhibitors?"
- Select "Save and Finish" (Fig. 1).

Fig. 1 - Profile Editor Networking Tab.
The attendee will appear in the Attendee List and be discoverable to send and receive messages.
NOTE
It may take up to 30 minutes for your profile to appear in the Chats system.
Using the Chats Feature
Accessing the Chat List
If your event is using the My Experience section of the site:
- Select the Networking tab.
- The Recent Chat List will open.
- All ongoing chats appear in the list, ordered by most recent.
Using the Attendee List:
- Navigate to the Attendee List.
- Selecting Show My Chats will launch a chat pop-up showing recent messages (Fig. 2).
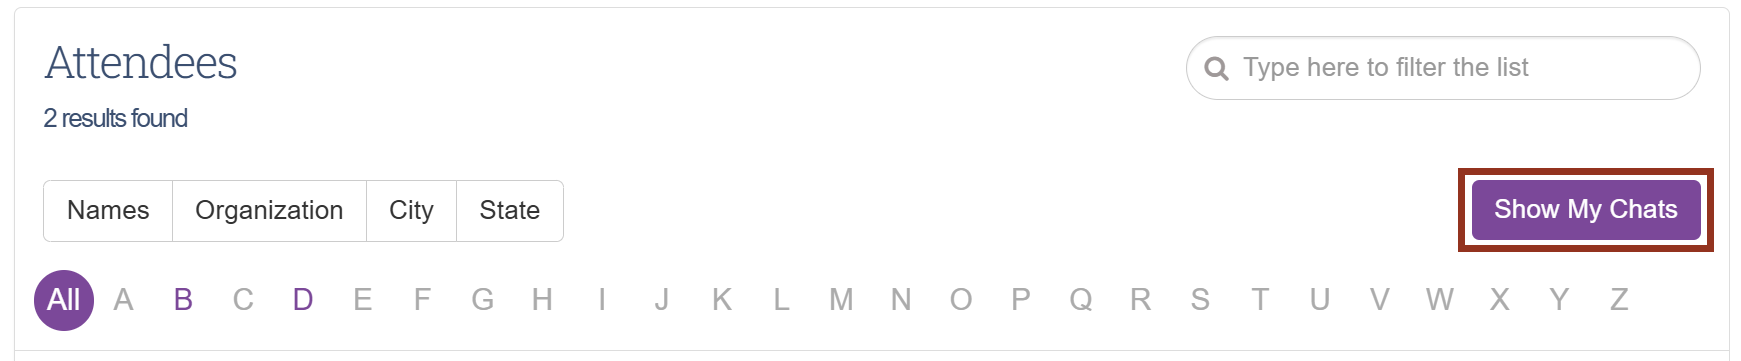
Fig. 2 - Attendee List Page Show My Chats Button.
- This chat window includes recent chats but focuses on the recent chat list with users whom chats have been initiated with.
Creating a New Chat
To start a new chat:

Alternatively, you can:
- Navigate to the full Attendee List.
- Select the attendee you wish to chat with.
- Select Chat from their profile pop-up.
- Begin your conversation from there.

Deleting a Chat
To remove a chat from your chat list:
- Go to the Recent Chats in the chat pop-up.
- Locate the three dots next to the attendee’s name.
- Select the three dots and select Delete Conversation.
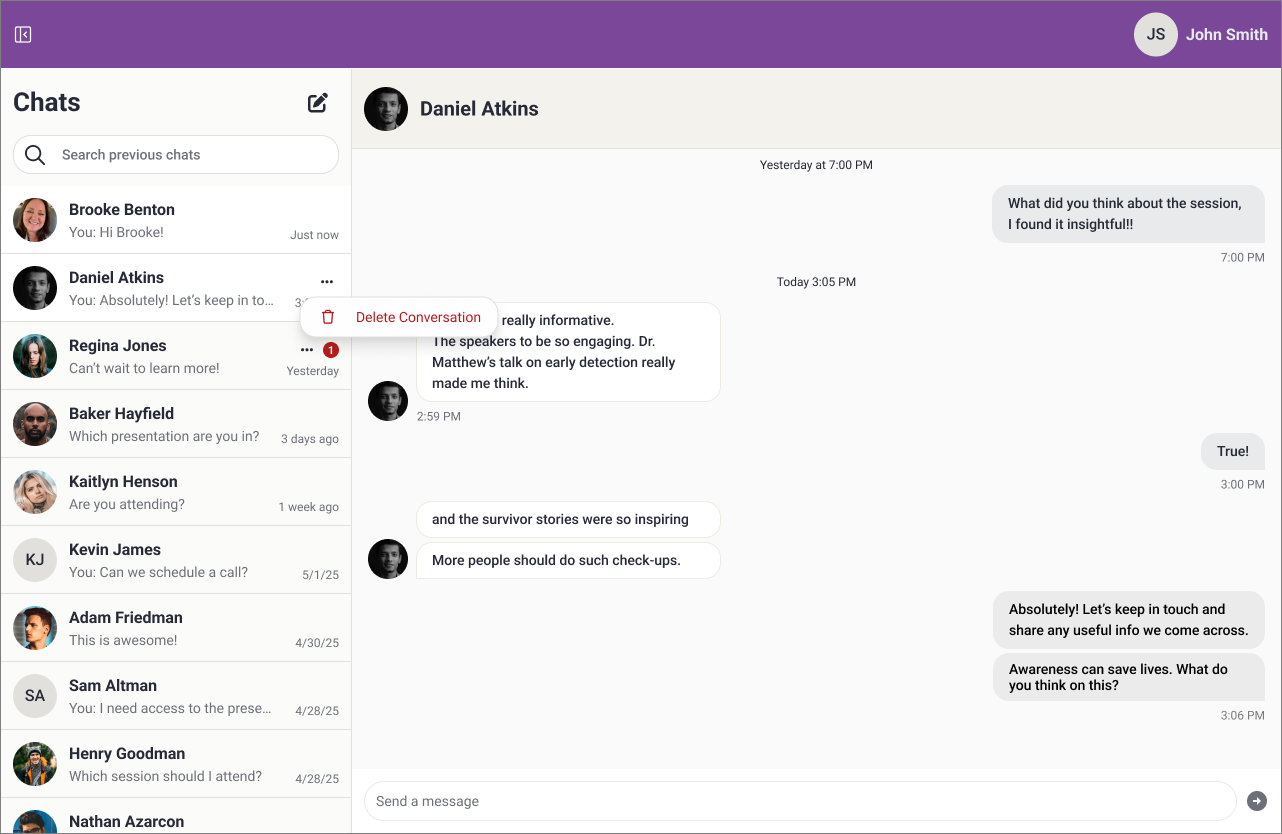
Deleting a chat removes it from your chat list but does not delete it for the other attendee.
IMPORTANT NOTE
Messages will sync between the Website and Mobile App if the event offers both platforms.
Last modified Mar 27, 2026
Was this article helpful?
That’s Great!
Thank you for your feedback
Sorry! We couldn't be helpful
Thank you for your feedback
Feedback sent
We appreciate your effort and will try to fix the article