- In the left-side menu, expand the General tab and select Custom Fields.
- Use Custom Short Fields for responses under 150 characters and Custom Long Fields for responses over 150 characters. Assign clear, descriptive labels to each field to make them easy to identify in the Survey Task editor and within Worksheets/Reports
- After entering text for the Custom Short or Long Fields, select Save Changes to apply your updates.
The Survey Task is used to collect responses from submitters through various question types, such as multiple-choice, checkboxes, and text fields. Each question must be mapped to a custom short or long field for data tracking, with short fields for responses under 150 characters and long fields for longer answers.
The following instructions will guide you through editing and activating a Survey task after it has been added from the Task Index. For information about how to add a task, please refer to the Add a New Task help tip.
IMPORTANT NOTE
Before editing a Survey Task, you must first create custom short or long fields for data mapping. For instance, if your survey includes three checkbox questions, you will need to create three corresponding custom short or long fields.
Adding Custom Short and Long Fields
To add a custom field, navigate to the Scorecard's Settings page and follow these steps:

Then, navigate to the Tasks page and find the Survey Task you want to edit and follow these steps:
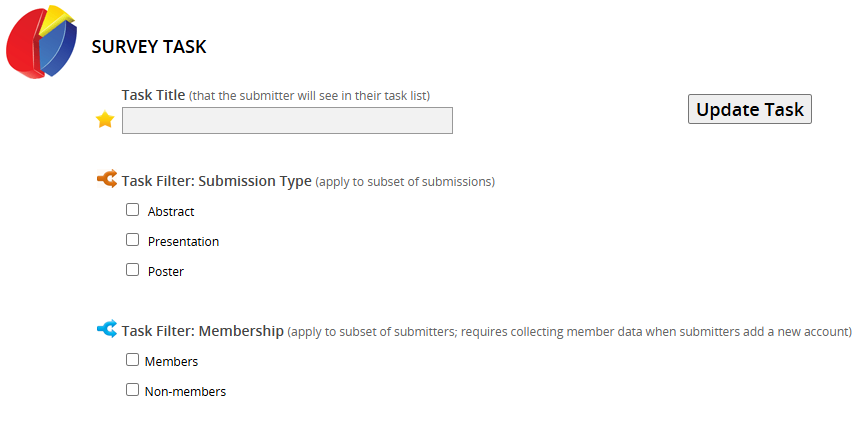
- Click on the row for the Survey task you want to edit.
- Select the Edit button.

- Update the Task Title to the task name you want the submitter to see on the live Scorecard.
- Choose which Submission Types this task should be filtered to.

You may choose to edit additional fields within the task settings. The gray text next to each setting provides guidance on where each field or text will appear on the Scorecard.
NOTE
Not all settings listed in this article may be applicable to your Scorecard.
Task Summary and Instructions
The Task Summary provides a brief overview of the task that will appear on the submitter's task list. In the Primary Instructions field, you can write detailed instructions for the task that submitters will see.

Edit the Continue Button Label
This field is required for the task settings, and the task cannot be saved without a label. While "Continue" is the recommended label, you may choose a different one.

- Activate the Task by changing the the status from Inactive to Active using the status drop-down menu.
- Then, update the Task Order to determine the position of the task on the submitter’s task list.

- Add Survey Questions by selecting the Survey Question Type from the drop down menu.
- Enter the question text, any supplemental text, and potential answer choices for the submitter. Answer choices are required for Dropdown, Checkbox, and True/False question types. Then, specify whether the question is required or optional.
- Next, select the Custom Field you created in the Settings page to map the question data. Each Custom Short or Long Field can only be used once within a Scorecard, and every Survey question must be linked to a Custom Short or Long Field, regardless of the question type.

- Select Update Task in the upper right corner of the page to save your changes. If any required fields are missing, a warning message will appear at the top of your screen.
NOTE
If you have created a Survey task for specific Submission Types and want to reuse the same task for a different Submission Type with minimal edits, please refer to the Duplicating and Filtering Tasks article for instructions.
Use the same mapping in other tasks only if you ask the same question. If two survey tasks have questions mapping to the same field, the latest response will overwrite previous responses.
Once the Survey task(s) have been added, edited, and filtered, test your Submission Site by logging in as a user on the Scorecard.
If you have any questions, please contact your Project Manager.
Was this article helpful?
That’s Great!
Thank you for your feedback
Sorry! We couldn't be helpful
Thank you for your feedback
Feedback sent
We appreciate your effort and will try to fix the article