Properties
While highlighted on any piece of information placed on the badge, you will see the Properties for that item in the gray area on the right. The fields that display here are specific to the piece of information you are adding.
For all data on the badge, there are fields for
- Width, Height, Top and Left. These are auto-calculated based on the position and size of the box and most likely will not need to be edited manually.
- Position - "Send Backward" and "Bring Forward" - These are useful if you are overlapping fields, such as an image with text that should display in front.
- Fields like "Value" or "Src" might require that data be entered in order for it to display on the badge (such as text you want to add), or might be prepopulated with the merge tag that is needed for that piece of data (such as the company name).
Text Based Properties
All fields designed to display text will include additional font related settings:
- Font Family
- Font Size
- Font Color
- Text Alignment - allows you to right, left or center justify the data.
- Text Capitalization - allows you to have the text display in the way it was originally entered, or to force it to be all lowercase, all uppercase, or to have each word capitalized.
- Text Decoration - allows you to bold, italicize and underline the data.
- Autosize
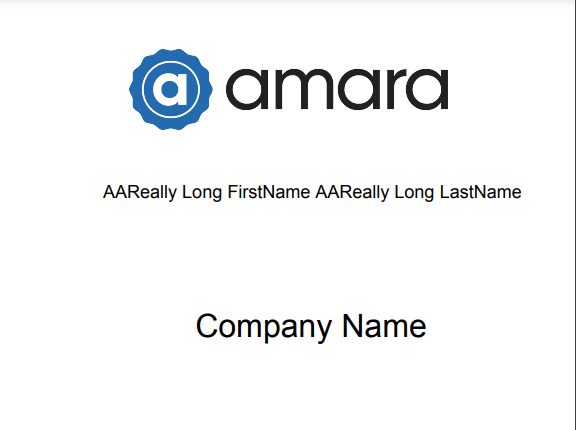
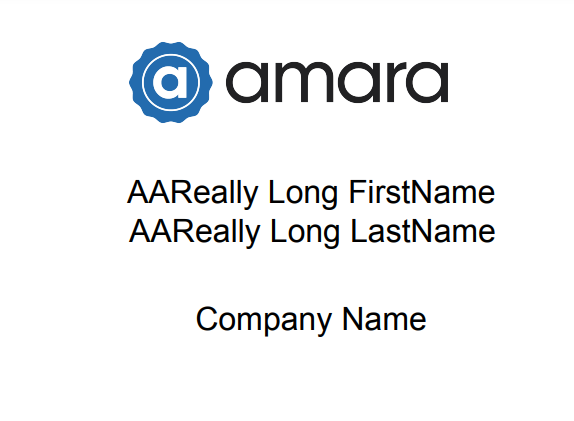
- By default, the data will display and wrap as many lines as necessary based on the font size selected. Autosize allows you to have the font size adjust automatically so that the data only displays on one line (Fig. 1), instead of wrapping (Fig. 2). This can be useful for data such as company names, which can vary in length greatly from attendee to attendee. It is best to select a font size that works for most companies and then either allow word wrap and leave space below for long names that wrap, or select Autosize so that the font size decreases and the company name stays on one line. It is recommended that you look at examples of badges with longer data, such as a long company name, to ensure that the badge layout you design will work for all attendees.

Fig 1 - Badge with Autosize selected for font

Fig. 2 - Badge with Wordwrap selected for font.
- Background Color - useful when you want to highlight the data, such as displaying a colored separator with the data.
- Background image
Image Properties
Image fields allow for the selection of a Display setting for "For Badge Layout and Preview Purposes only". Selecting this will allow the image inserted to display on any previews, but will not print on the badge. This can be useful for clients that are having badge stock pre-printed with event graphics, and want them to display for attendees to preview, or to help with aligning the other data fields, but do not want the image to print on the final badge.
Advanced Properties
Clicking "+ Show Advanced" for all fields allows you to expand a section of advanced settings, including Display and Style controls. Style should not be edited unless you are aware of HTML, however the Display area contains robust filtering settings that allow you to set logic to control when certain pieces of information should display based on other selections that attendee has made in their registration, including restricting or displaying data based on specific fees, or based on specific UDF responses. These settings allow you to create very customized badges for each attendee.
Overall Badge Properties
If you click onto the badge in an area not populated with a field, you can access the overall badge properties, including Background Color and Background Image. Background Images also have a Background Image Display setting for "For Badge Layout and Preview Purposes only". Selecting this will allow the image inserted to display on any previews, but will not print on the badge. This can be useful for clients that are having badge stock pre-printed with event graphics, and want them to display for attendees to preview, or to help with aligning the other data fields, but do not want the image to print on the final badge.
Was this article helpful?
That’s Great!
Thank you for your feedback
Sorry! We couldn't be helpful
Thank you for your feedback
Feedback sent
We appreciate your effort and will try to fix the article