This article outlines how to change the Admin Contact for a company.
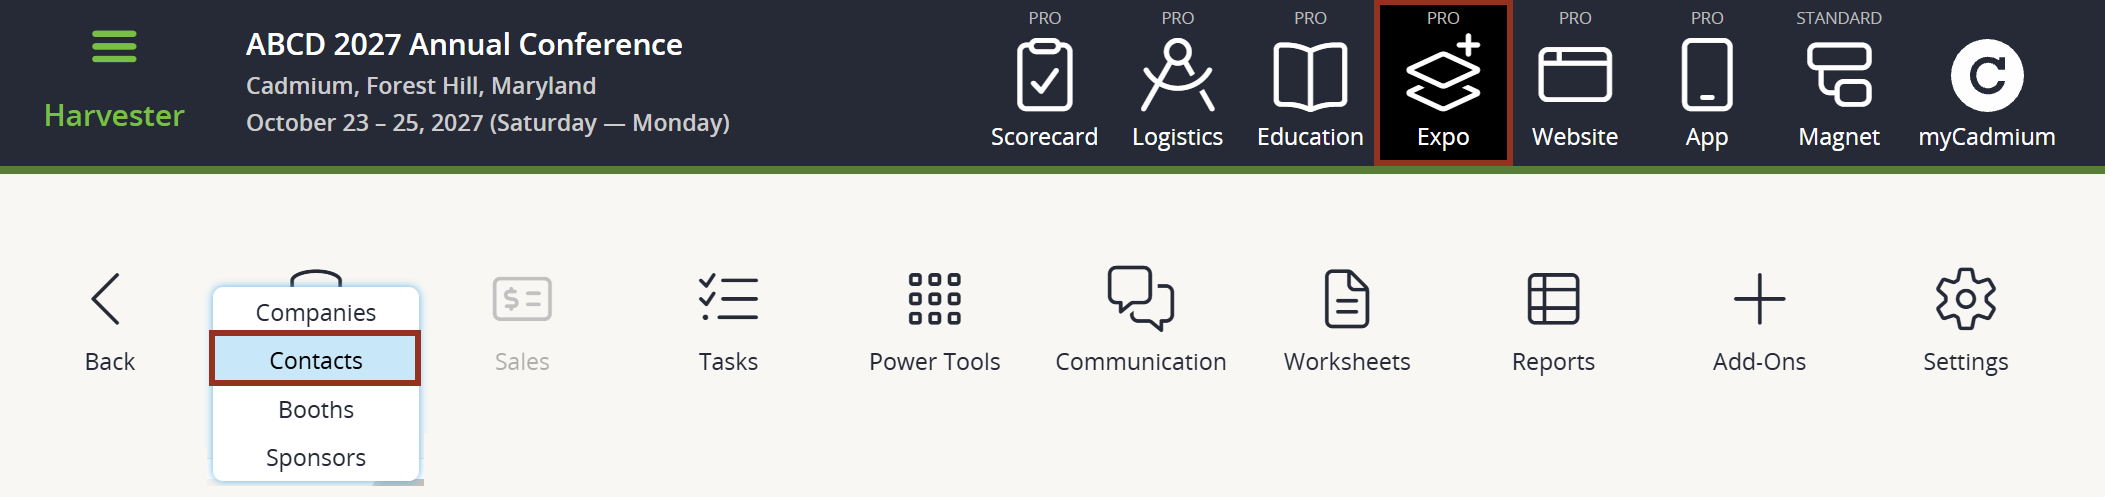
- Launch the Expo Harvester for your event. In the main navigation, hover over the Expo Data icon then select Contacts (Fig. 1).
Fig. 1 - Expo Harvester's Expo Data Icon.
- Click on the ADD CONTACT button in the upper left corner to start the process of adding a new admin (Fig. 2).
Fig. 2 - Contacts Page Add Contacts Button.
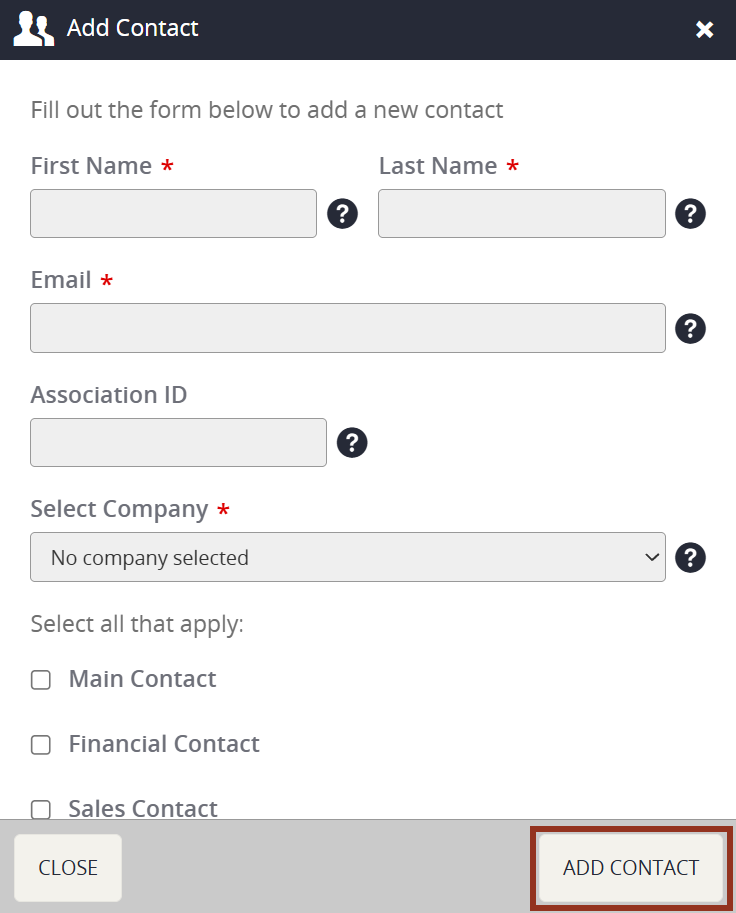
- Enter the new admin's First Name, Last Name, and Email Address.
- Choose the Company from the dropdown menu.
- Select the Contact Type. The primary administrative contact is the "Main Contact." Other contact types can be selected as desired, but none are required.
When done, select the ADD CONTACT button at the bottom of the popup.
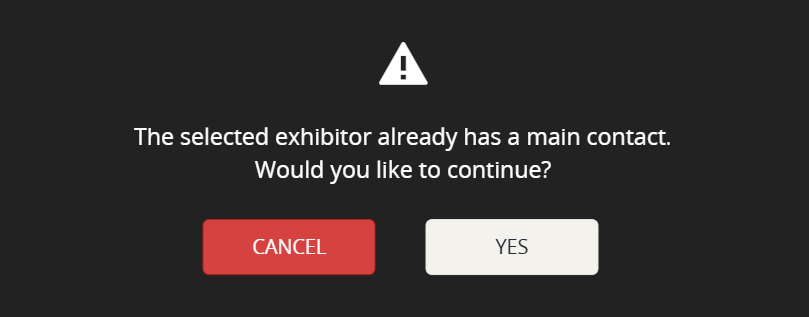
- On the next popup, you will need to confirm that your intent is to replace the existing main contact of the company. Select Yes (Fig. 4).
Fig. 4 - Confirmation Popup.
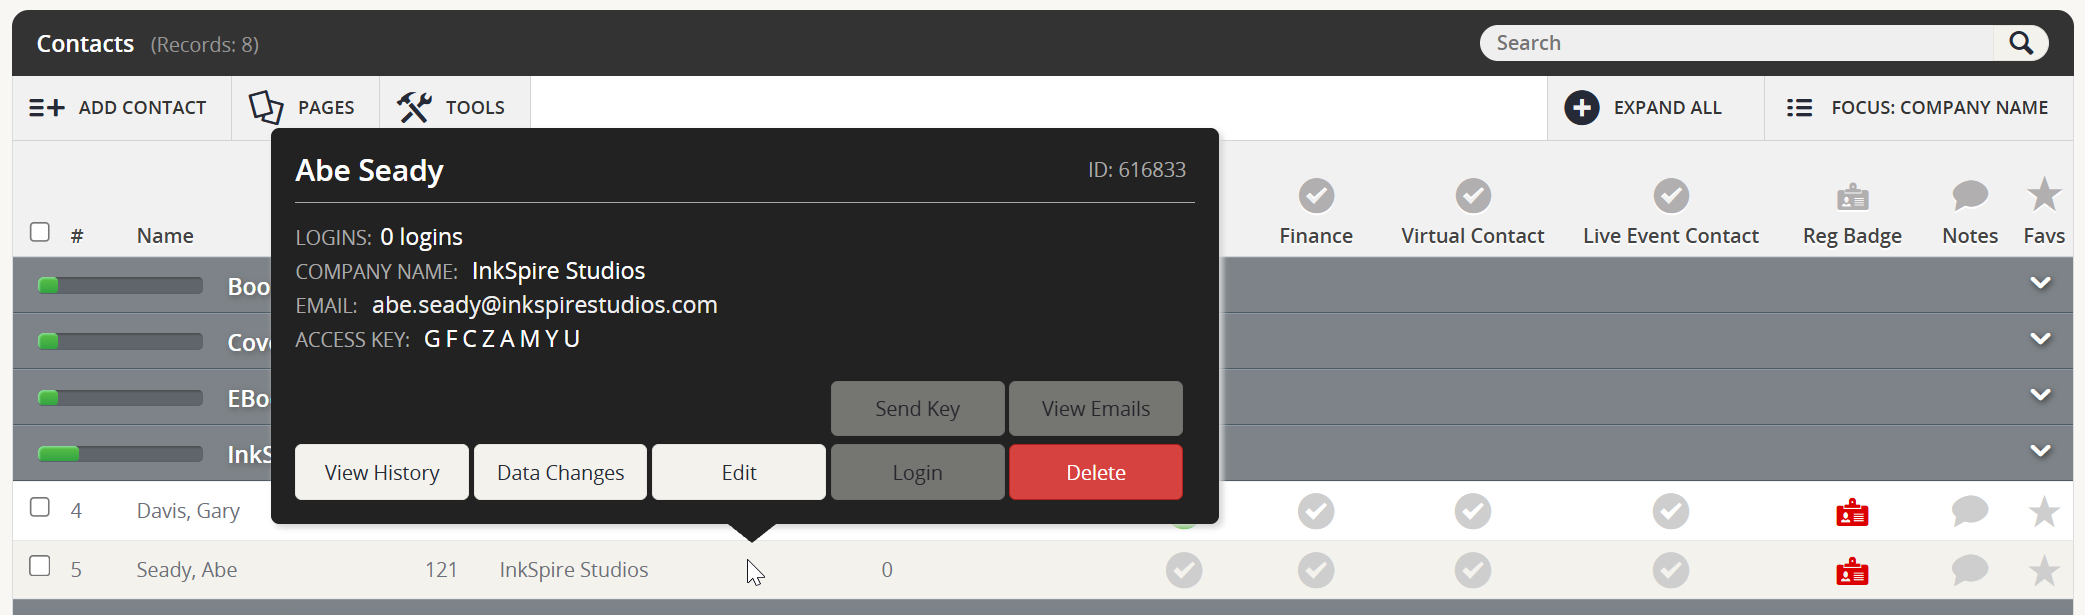
- You will be taken back to the main Contacts page where you will see both admin accounts for that company. The old contact will no longer have admin privileges. You can delete the old admin by clicking on their name and then the red Delete button.
Fig. 5 - Contacts Page Contacts Popup.